Choosing Tile Adhesive and Grout: IS 15477 Types and Fixing Systems
Written for specifiers, contractors and owners fixing tile in Indian conditions. It resolves which IS 15477 adhesive type suits each tile and substrate combination, which grout belongs in the joint, and where the build-up beneath the tile decides whether the job survives.
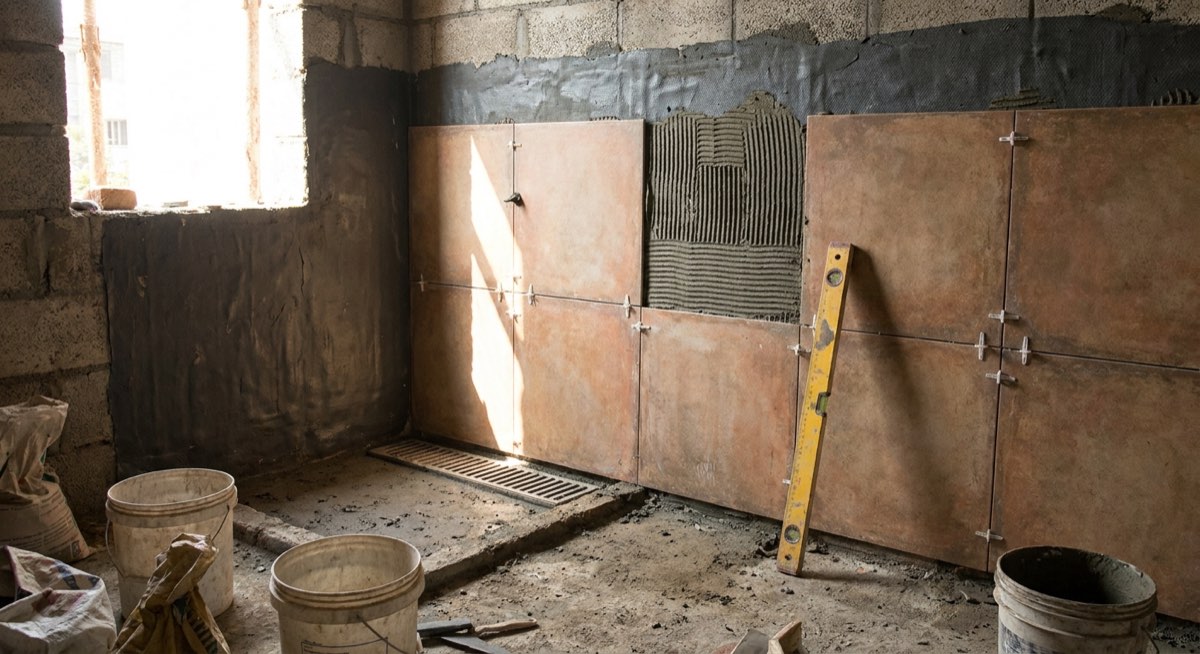
What this guide settles
IS 15477:2019 classifies tile adhesives into five types. Type 1 suits absorbent ceramic tiles on internal cement substrates. Type 2 handles vitrified tiles, glass mosaic and stone in wet areas. Type 3 is the exterior and large-format workhorse. Type 4 is polymer-rich for gypsum, plywood and board substrates, with S1 or S2 deformability for tiles above 600 mm. Type 5 is reaction-resin for metal, glass and chemically aggressive service. Suffix T means non-slip, E means extended open time. Pair Type 2 and above with a CG2 cementitious grout, or epoxy grout in pools, kitchens and effluent areas.
What are you fixing, and what are you fixing it to?
Pick the condition that matches your project. The specification, the build-up and the products update as you choose.
IS 15477 Type 2T adhesive (C2T), CG2 cementitious grout, 3 mm joints.
Vitrified tile has apparent porosity at or below 3 percent, so it takes up almost no water and cannot key mechanically. A Type 2 polymer-modified adhesive supplies the chemical bond that sand-cement cannot. The T suffix stops vertical slip on walls. Type 3 only becomes necessary when the format exceeds 600 mm or the wall is external.
- Cement plaster or screed cured 28 days, no laitance, moist-cured and dry to touch
- Level check: 3 mm deviation under a 2 m straightedge before tiling starts
- Type 2T adhesive, 6-10 mm square notch, ribs combed one direction
- Tile bedded and beaten in within open time; lift one tile per 20 to verify coverage
- CG2 cementitious grout after 24 hours; silicone at all wall-floor junctions
IS 15477 Type 1 adhesive is sufficient; do not pay for Type 3 here.
Absorbent ceramic above 3 percent porosity keys mechanically and forgives a weaker bond. Type 1 meets the duty on stable internal plaster in a dry room. The honest caveat: a bathroom wall is not a dry room. Any splash zone or shower enclosure moves the specification up to Type 2.
- Plaster true to 3 mm in 2 m, dust-free, dampened but not saturated
- Type 1 cementitious adhesive at 3-5 mm bed, 6 mm square notch
- Work in 1 m2 panels so the ribs never skin before the tile lands
- CG2 grout at 24 hours; silicone bead at counter and sanitaryware perimeters
IS 15477 Type 3 or Type 4 adhesive over a mechanically keyed and primed existing tile.
The existing glaze is a non-absorbent, low-energy surface, so bond depends entirely on polymer content and surface preparation. Sound every tile first; any hollow one must come out. Mechanically grind or abrade the glaze — acid etching does nothing to a vitreous glaze — then degrease and prime. The overlay also adds dead load and raises floor level, which matters at door thresholds and drains.
- Tap-test the whole floor; cut out and make good every hollow tile
- Mechanically abrade the glaze, degrease, wash off residue, allow to dry
- Bond primer or acrylic polymer-modified key coat over the prepared glaze
- Type 3 or Type 4 adhesive, back-buttered, 6-10 mm bed
- Carry existing movement joints straight through into the new tile field
IS 15477 Type 4 adhesive with a declared S1 deformability class; S2 above 1200 mm. A C2TE adhesive with no declared S1 or S2 does not meet this duty, whatever its bond strength.
Board substrates flex, and a rigid bed transfers that movement straight into the bond line. Type 4 is the polymer-rich class written for boards, and its transverse deformation rating of 2.5 to 5 mm (S1) or above 5 mm (S2) is what absorbs the movement. Neither adhesive shown here carries a declared S1 class, so confirm a deformable grade on the current TDS before ordering. Check board fixing centres before blaming the adhesive.
- Board fixed at manufacturer’s centres; no deflection beyond L/360 under load
- Joints taped and skimmed; primer per board manufacturer before adhesive
- Type 4 adhesive, S1 minimum, notched bed plus full back-butter on the slab
- Suction cups and a levelling clip system to hold plane during set
- Perimeter and internal corners left open and sealed with silicone, not grout
Fosroc Brushbond membrane beneath, then IS 15477 Type 2 or Type 3 adhesive, CG2 or epoxy grout.
This is where Fosroc belongs in a tiling specification: the membrane, not the bed. Brushbond is a flexible cementitious coating, so a cementitious thin-bed adhesive bonds to it directly once fully cured. Light-coloured marble also needs a non-staining adhesive, often white, to prevent picture-framing and shadowing through the slab.
- Screed to falls, 1 in 80 minimum to the drain, cured before coating
- Two coats Fosroc Brushbond RFX at right angles, fillet at all junctions
- 48-hour flood test held and signed off before any tiling starts
- Type 2 or Type 3 adhesive over the fully cured membrane, 4-6 mm bed
- Epoxy grout in showers; silicone at wall-floor and drain perimeters
IS 15477 Type 3 (C2TE) adhesive, mechanical anchors above 3 m, movement joints every 3 to 4 m.
External vertical work fails on thermal cycling, not on day-one adhesion. A Type 3 adhesive is tested wet, heat-aged and freeze-thawed, and the E suffix buys open time when the wall face is at 45 degrees. Above roughly three metres, adhesive alone is not the design; specify undercut anchors or a hybrid support.
- Plaster sound, dust-free, dampened; no work on a face in direct afternoon sun
- Type 3 C2TE adhesive, full bed by notch plus back-butter, no spot dabs
- Mechanical anchors or a support system for cladding above 3 m
- Movement joints every 3-4 m and at every structural junction
- CG2 grout; sealant, not grout, in every movement and perimeter joint
Waterproof the shell with Fosroc Brushbond, fix with IS 15477 Type 2 or Type 3, grout with epoxy (RG).
Permanent immersion plus chlorinated water attacks the joint long before the bed. Cementitious grout leaches and opens a path to the adhesive, so epoxy grout is not optional here. Glass mosaic is also non-absorbent on both faces, so the adhesive must be white where the mesh and bed show through the tile.
- Shell water-tested for 7 days before any coating goes on
- Fosroc Brushbond system to the shell, coved fillets at all internal angles
- Second flood test after cure; sign off before mosaic is delivered to site
- Type 2 or Type 3 white adhesive, full bed, no voids behind the mesh
- Epoxy (RG) grout throughout; fill and cure before the pool is filled
Selections are indicative. Send us the substrate, exposure and area and Space Arc Engineering will confirm the specification.
Comparison table
| IS 15477:2019 type | EN 12004 / ISO 13007 class | Written for | Typical bed or joint | Minimum adhesion or strength |
|---|---|---|---|---|
| Type 1 | C1 / C1T | Absorbent ceramic up to 300 x 300 mm, internal dry walls and floors | 3-5 mm bed | 0.5 N/mm2 tensile, dry |
| Type 2 | C2 / C2T | Vitrified, glass mosaic and stone internally, including wet and submerged areas | 3-6 mm bed | 1.0 N/mm2 tensile, dry and after water immersion |
| Type 3 | C2TE | External walls, facades, terraces and formats above 600 mm on plaster or concrete | 3-10 mm bed | 1.0 N/mm2 tensile across all four conditioning regimes |
| Type 4 | C2TE S1 or S2 | Large slabs on gypsum, plywood, cement board, membranes and heated screeds | 4-12 mm bed | 1.0 N/mm2 tensile plus deformation 2.5-5 mm (S1) or above 5 mm (S2) |
| Type 5 | R2 / R2T | Any tile on metal, glass or GRP; chemical, thermal-shock and hygiene duty | 2-5 mm bed | 2.0 N/mm2 shear, reaction resin |
| Grout, CG1 | ISO 13007-3 CG1 | General internal joints in stable, dry residential areas | 2-12 mm joint | Flexural 2.5 N/mm2, compressive 15 N/mm2 |
| Grout, CG2 | ISO 13007-3 CG2 (A, W) | Wet areas, external joints and heavy-traffic commercial floors | 2-12 mm joint | CG1 minima plus reduced water absorption and higher abrasion resistance |
| Grout, RG | ISO 13007-3 RG | Pools, kitchens, dairies, effluent channels and STP areas | 2-15 mm joint | Flexural 30 N/mm2, compressive 45 N/mm2 |
What this looks like in practice
The work Space Arc Engineering supplies and applies, matched to the systems and steps described above.
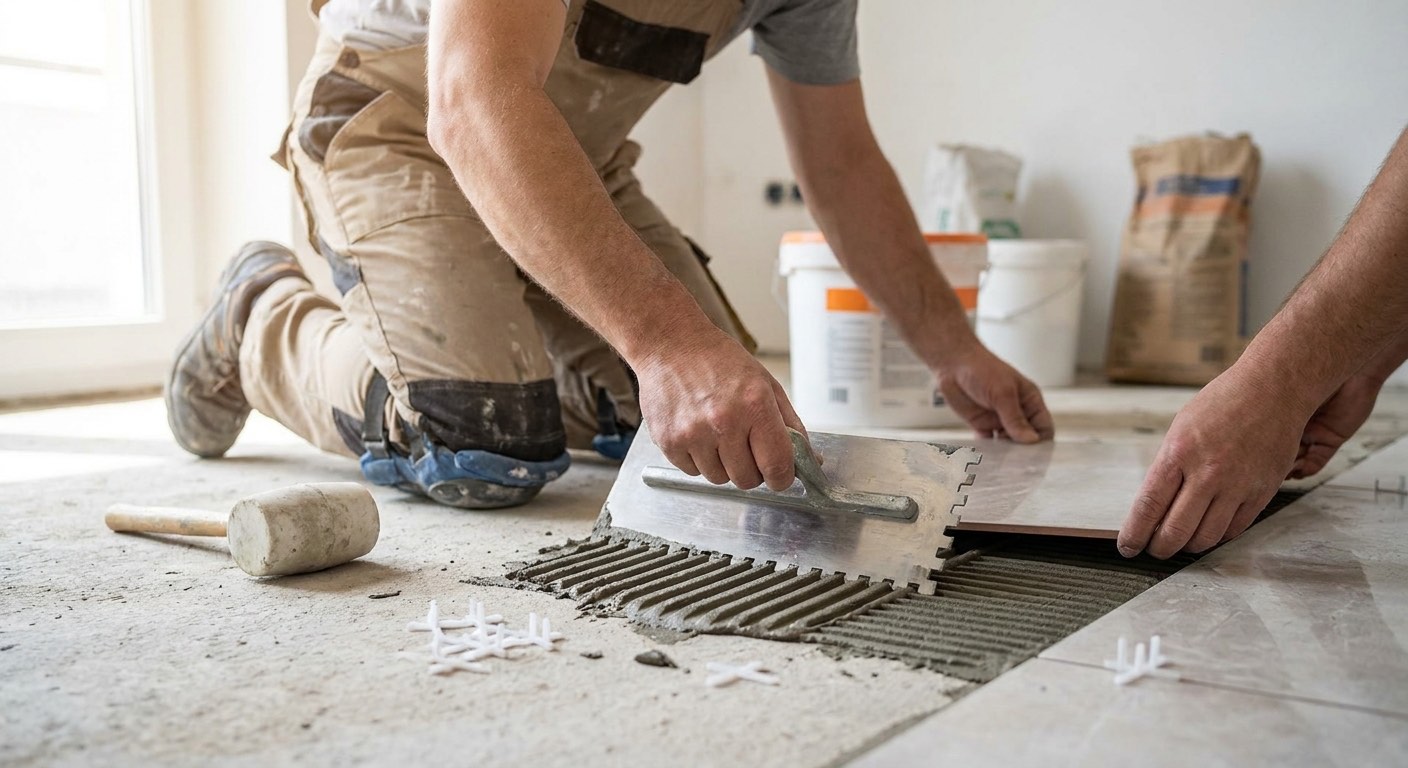
Type 3 exterior and large-format (C2TE)
A high-polymer cementitious adhesive formulated to retard surface skinning, so combed ribs stay open and transferable for longer. It is tested wet, heat-aged and after freeze-thaw, which is what qualifies it for a facade rather than a bathroom. External cladding, terraces, balconies, 600 mm and larger formats, and any surface that will cycle between 20 and 60 degrees through a day. The E suffix is the practical difference on a hot Indian site.
Waterproof wherever water will stand
In bathrooms, balconies, terraces, tanks and pools, apply the membrane before tiling, not after a leak appears. Two coats at right angles, coved fillets at every wall-floor junction, and the coating turned up at least 150 mm behind the tile.
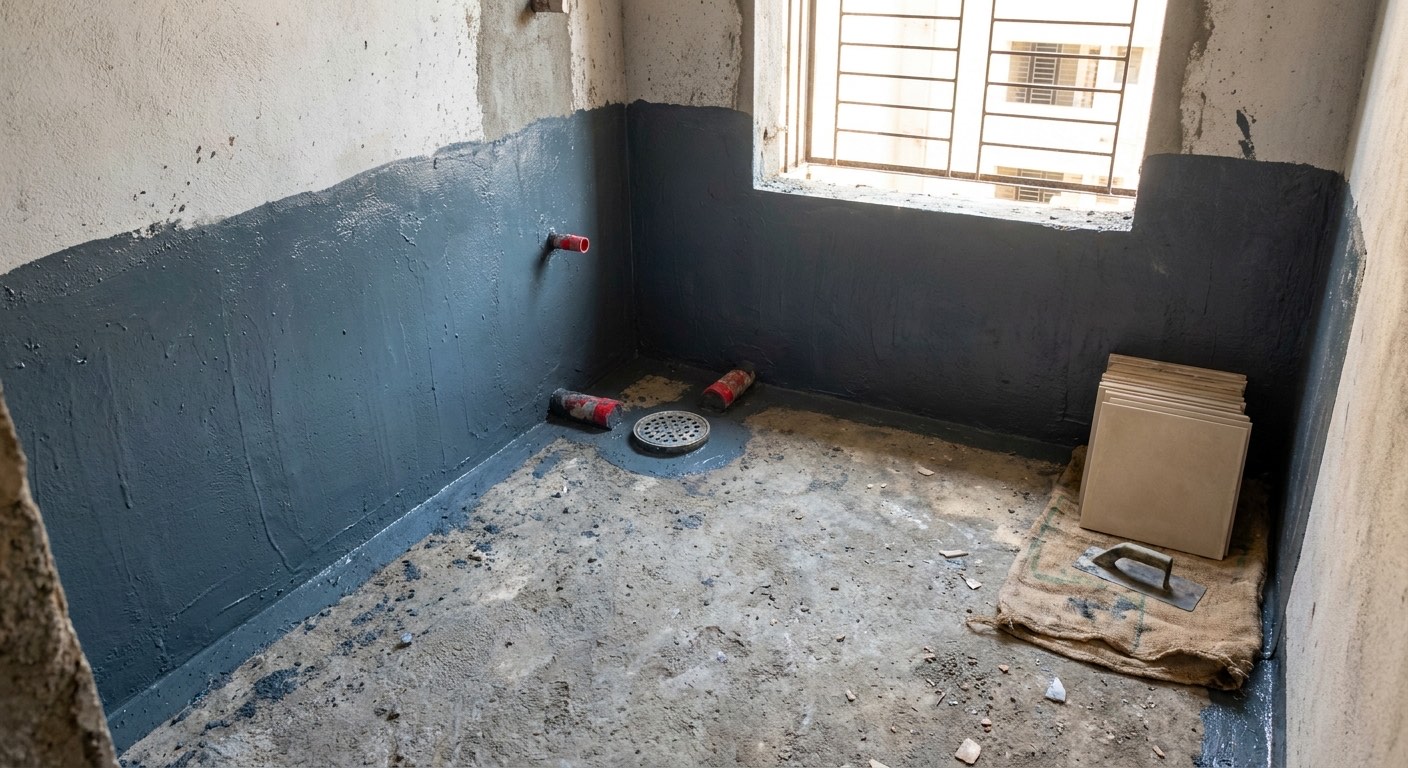
The correct sequence, in order
Skipping a step here is what turns a specified system into a warranty claim. Space Arc supervises these hold points on the projects it applies.
- 1
Verify the substrate before ordering anything
Establish what the tile is going onto: age of the concrete or screed, level deviation under a 2 m straightedge, soundness by tap-test, and whether the area is internal, external, wet or submerged. The adhesive type follows from those answers, not from the tile invoice.
Hold point: Written confirmation that the substrate is at least 28 days old and within 3 mm deviation over 2 m. - 2
Prepare and correct the surface
Remove laitance, curing compound, oil and loose plaster. Fill and make good local defects with a repair mortar, not with adhesive. Correct level using a screed or levelling compound rather than trying to build it out inside the tile bed.
Hold point: Substrate signed off clean, sound and free of curing compound before any primer is applied. - 3
Waterproof wherever water will stand
In bathrooms, balconies, terraces, tanks and pools, apply the membrane before tiling, not after a leak appears. Two coats at right angles, coved fillets at every wall-floor junction, and the coating turned up at least 150 mm behind the tile.
Hold point: 48-hour flood test held, water level recorded at start and finish, result signed by the site engineer. - 4
Let the membrane and screed cure
Cementitious membranes and screeds both keep moving after they look finished. Allow the cure stated on the datasheet before adhesive goes on, and check residual moisture where the programme is tight. This is the step most often compressed and most often regretted.
Hold point: Membrane cure period elapsed per datasheet and recorded on the pour or coating register. - 5
Set out the field and fix the movement joints
Mark the tile layout, the perimeter gap and the movement-joint grid before the first tile is bedded. Externally and on terraces, plan joints every 3 to 4 metres and at every structural break, and carry them through the full bed depth.
Hold point: Setting-out drawing with movement joints marked, approved before fixing starts. - 6
Mix and comb under open-time discipline
Gauge with clean water at the stated ratio, mix mechanically at low speed, stand for the slake period, then remix briefly. Never re-temper with extra water once it stiffens. Comb only the area the tiler can cover before the ribs skin over.
Hold point: Finger-touch check on the combed bed: reject and re-comb any surface that no longer smears. - 7
Bed, beat in and verify coverage
Place the tile across the ribs, then beat or twist it in so the ridges collapse into a solid bed. Back-butter every tile above 600 mm and all natural stone. Lift a tile periodically and look at the back before deciding the crew has it right.
Hold point: One tile in twenty lifted and photographed; minimum 95 percent bed contact in wet and external areas. - 8
Grout, then seal the moving joints
Grout no earlier than 24 hours after fixing, packing joints to full depth in two passes and cleaning within the working window. Then fill every perimeter, internal corner and movement joint with sealant, because grout in a moving joint will always crack.
Hold point: Joints sounded full-depth and perimeter sealant continuous before handover or flooding.
Why this fails on Indian sites
Most failures are not product failures. These are the ones Space Arc Engineering’s applicators get called in to put right, usually years after the original job.
Spot-bedding instead of a full ribbed bed
- What you see
- Tiles sound hollow within months, corners chip under point load, and water reappears at the ceiling below a bathroom that was waterproofed correctly.
- Root cause
- Five dabs of adhesive under each tile leave 60 to 70 percent of the back unsupported. The voids fill with water that has no drainage path, and every load cycle works against four small bond points.
- How to prevent it
- Specify a solid bed by notched trowel plus back-buttering, and enforce it by lifting one tile in twenty during fixing. Accept nothing below 95 percent contact in wet areas, externally and under large-format tiles, and nothing below 80 percent in dry internal areas.
Adhesive ribs skin over before the tile lands
- What you see
- Tiles debond cleanly, leaving crisp comb ridges standing on the bed and almost no adhesive transferred onto the tile back.
- Root cause
- At 38 to 45 degrees ambient with wind, a combed surface skins well inside the stated open time. Gangs comb out four or five square metres ahead of the tiler, which guarantees the front of that area is already dead.
- How to prevent it
- Comb no more than one square metre ahead in summer, specify an extended-open-time (E) adhesive, shade the working face, and reject any rib that no longer smears when touched with a finger.
No movement joints in a continuous tiled field
- What you see
- Tiles tent or shear along a line in the first hot season, usually on a terrace or a long corridor, with grout crushed to powder along the failure line.
- Root cause
- A tiled terrace can swing 30 degrees or more between night and afternoon. With no joint, that expansion has nowhere to go, so compressive stress builds until the field buckles or the bond shears.
- How to prevent it
- Movement joints every 3 to 4 metres externally and at every perimeter, column and structural joint. Fill them with sealant, never with grout, and carry them through the full adhesive bed to the substrate.
Tiling onto a screed that is still shrinking
- What you see
- Bond fails across whole bays a few months after handover, and the failure plane sits between the adhesive and the screed rather than at the tile back.
- Root cause
- Programme pressure puts tile on a screed at 7 to 10 days. Cement screed keeps shrinking for weeks afterwards, and that movement strips a rigid thin bed off the surface it is holding.
- How to prevent it
- Hold the screed 21 to 28 days, or specify a rapid-drying screed and test residual moisture. Where the wait is genuinely impossible, use a deformable adhesive and pay the cost rather than carry the risk.
Cementitious grout in a chemically aggressive joint
- What you see
- Joints darken, then soften and wash out in pool surrounds, commercial kitchens and NCR treatment-plant areas, while the tile itself is still firmly bonded.
- Root cause
- Cementitious grout is porous and lime-based. Chlorinated water, hot alkaline cleaning and hydrogen sulphide in sewage environments attack it directly, and once the joint opens, water reaches the bed.
- How to prevent it
- Specify a reaction-resin (RG) epoxy grout for pools, kitchens, dairies, effluent channels and STP areas from the start. Retrofitting epoxy into a failed cement joint costs far more than specifying it once.
Tiling onto waterproofing before it has cured
- What you see
- A membrane that passed its flood test still leaks after tiling, and the failure sits between the coating and the adhesive rather than in the coating itself.
- Root cause
- Cementitious membranes need full cure before they can carry a bond. Tiled at 24 hours the coating is still gaining strength, and the adhesive pulls the surface film away. Dusty or laitance-covered coating surfaces compound it.
- How to prevent it
- Cure the membrane for the full period stated on the datasheet, flood test for 48 hours, record the result, then tile. Confirm on the adhesive TDS that it is approved over that specific membrane.
Systems compared, including where each one fails
Every system here is one Space Arc Engineering both supplies and applies, so the limitations listed are the ones we see on site rather than the ones in a brochure.
Thick-bed sand-cement mortar
The traditional Indian method: a 12 to 20 mm bed of sand and cement laid semi-dry, with a neat cement slurry buttered onto the tile back. Bond is mechanical and depends on the tile absorbing water from that slurry.
Cheap, tolerant of badly out-of-level substrates, and it can build falls and level in the same operation. Still the sensible choice for absorbent ceramic and Kota or Shahabad stone on rough site concrete.
It cannot bond vitrified tile, which absorbs nothing. Hollow patches are normal rather than exceptional, the bed shrinks as it cures, and 15 mm of mortar adds real dead load across a slab.
Typical spec. 1:4 to 1:6 cement:sand bed at 12-20 mm laid onto a slurry key; acrylic polymer bonding aid gauged roughly 1:3 with cement for the key coat; 7 days moist cure before grouting; light foot traffic at 72 hours.
Type 1 cementitious adhesive (C1)
A dry mix of Portland cement, graded silica sand and a modest dose of redispersible polymer, gauged with water on site. It sets by hydration and holds through a combination of chemical bond and mechanical key into the tile’s porous body.
Absorbent glazed ceramic up to 300 mm square on stable internal cement plaster in dry rooms. Cheapest compliant thin-bed option and the correct answer for a great deal of ordinary residential wall tiling.
Anything non-absorbent, external, wet or large. Specifying C1 for vitrified tile is the single most common paper failure in Indian tiling, and it usually surfaces in the second monsoon rather than the first.
Typical spec. 3-5 mm net bed, 6 mm square-notch trowel, roughly 4-5 kg per square metre; pot life 2-3 hours at 30 C; open time 20-30 minutes; grout at 24 hours; full service at 7 days.
Type 2 polymer-modified (C2, C2T)
The same cementitious base as Type 1 but with a substantially higher redispersible polymer loading, which forms a continuous polymer film through the hardened bed. That film is what grips a tile body with three percent porosity or less.
Vitrified and glazed vitrified tile, glass mosaic and stone on internal floors and walls, including wet areas and submerged work. The T suffix holds wall tiles in place without slipping while the bed sets.
Deformability is not declared, so it is the wrong class over boards, over membranes that move, or on heated floors. Above 600 mm format or on an external facade it is being asked to do a Type 3 job.
Typical spec. 3-6 mm bed, 6-10 mm square notch on floors, 4-6 kg per square metre; open time 20-30 minutes; adjustment window 10-20 minutes; grout at 24 hours; 7-day cure before flooding.
Type 3 exterior and large-format (C2TE)
A high-polymer cementitious adhesive formulated to retard surface skinning, so combed ribs stay open and transferable for longer. It is tested wet, heat-aged and after freeze-thaw, which is what qualifies it for a facade rather than a bathroom.
External cladding, terraces, balconies, 600 mm and larger formats, and any surface that will cycle between 20 and 60 degrees through a day. The E suffix is the practical difference on a hot Indian site.
It costs meaningfully more and delivers nothing extra on a small internal ceramic job. It also does not make a bad substrate good: a screed still shrinking will take the tile with it regardless of adhesive class.
Typical spec. 3-10 mm bed, 10-12 mm square or U-notch, 5-8 kg per square metre; extended open time 30 minutes or more; back-buttering mandatory above 600 mm; grout at 24-48 hours; full load at 14 days.
Type 4 deformable over boards
Here the polymer moves from adhesive aid to structural function: the hardened bed is designed to deflect. IS 15477 Type 4 carries a declared transverse deformation, S1 at 2.5 to 5 mm or S2 above 5 mm, measured on a cured strip.
Gypsum, plywood, calcium silicate and cement boards, over sheet or liquid membranes, on heated screeds, and under slabs beyond 1200 mm where differential movement across the tile face is real rather than theoretical.
Deformability is not strength. A deformable bed on a substrate genuinely deflecting past L/360 buys time, not a fix. The S1 or S2 rating must appear on the datasheet, not be inferred from the price.
Typical spec. 4-12 mm bed, notched application plus 100 percent back-butter, 8-12 kg per square metre; an S1 or S2 class must be declared on the current TDS — none of the products shown against this system carries a declared deformability class, so treat them as the nearest C2TE option and source a declared S1 or S2 grade before specifying; prime per the board manufacturer; leave all perimeters open for sealant.
Type 5 reaction-resin adhesive
One or multi-component epoxy, polyurethane or furane systems with mineral fillers. There is no cement and no hydration; it cures by chemical reaction, which is why it bonds to steel, glass and GRP and shrugs off acids and thermal shock.
Metal and glass substrates, dairy and food floors, battery rooms, laboratory benching, and industrial areas facing chemical attack or steam cleaning where a cementitious bed would simply be dissolved over time.
Unforgiving on site: short pot life, no water tolerance during cure, and it demands genuinely clean, dry, abraded substrates. Several times the material cost, and Indian supply is indent rather than shelf stock.
Typical spec. 2-5 mm bed, notch and back-butter; pot life often under 45 minutes at 30 C; substrate moisture below about 4 percent. No product in this range is a declared IS 15477 Type 5 adhesive; the epoxy items shown against this system are reaction-resin grouts, so a Type 5 adhesive has to be brought in on indent and cannot be substituted with an epoxy grout.
Cementitious grout (CG1, CG2)
Portland cement, fine graded fillers, pigment and polymer, mixed to a plastic consistency and worked into the joint. CG2 adds improved abrasion resistance and reduced water absorption over CG1; the A and W suffixes declare those properties.
Almost every internal and external joint from 2 to 12 mm. Easy to place, easy to clean off, easy to patch years later, and it takes colour reliably and consistently across large uninterrupted fields.
It is porous. In showers, kitchens and any chlorinated or effluent exposure it absorbs, stains, grows mould and eventually washes out, opening a direct route down to the adhesive bed beneath the tile.
Typical spec. Joint 2-12 mm depending on tile edge and format; grout no earlier than 24 hours after fixing; pack full depth in two passes; sponge off within 20-30 minutes; keep damp 24 hours; specify class CG2 for wet and external work.
Epoxy grout (RG)
A two or three-part epoxy resin, hardener and graded filler that cures to a dense, essentially non-absorbent joint. Flexural strength is roughly ten times that of a cementitious grout (30 against 2.5 N/mm2) and compressive strength about three times (45 against 15 N/mm2).
Swimming pools, commercial kitchens, dairies, hospitals, effluent channels and STP areas, and any joint that must not stain. It also holds up in NCR sewage environments where hydrogen sulphide destroys cement grout.
The application window is short and cost per square metre is several times cementitious. Cleaned late, the residual haze becomes a permanent defect no scrubbing recovers. It genuinely needs a trained crew, not a general mason.
Typical spec. Joints 2-15 mm; mix full units only, never part-batches; work in 2-3 square metre panels; initial haze removal within 15-30 minutes at 30 C; light traffic at 24 hours; chemical or immersion service at 7 days.
The standards this work is specified against
Quote these in your tender documents. They are what a third-party inspector will check against, and Space Arc Engineering can supply the batch and compliance paperwork to match.
The governing Indian standard. Defines adhesive Types 1 to 5, the T (slip resistance, not more than 0.5 mm) and E (extended open time) suffixes, and the S1 and S2 transverse deformation classes used for large-format and board work.
Classifies the tile itself by water absorption, which is the property that decides the adhesive type. Group BI tiles — BIa at or below 0.5 percent and BIb above 0.5 and up to 3 percent absorption — are what force the move from Type 1 to Type 2 and above.
The test methods behind tile acceptance on site: dimensions and surface quality, water absorption, breaking strength, thermal shock, crazing and chemical resistance. Useful when a dispute turns on the tile rather than the adhesive.
Source of the C1 and C2 classification most Indian datasheets quote alongside IS 15477, with C1 at 0.5 N/mm2 and C2 at 1.0 N/mm2 minimum tensile adhesion, plus the T, E, F, S1 and S2 designations.
Defines the grout classes CG1, CG2, the A and W suffixes and reaction-resin RG, with the flexural, compressive, shrinkage and water-absorption limits quoted in this guide. Mirrored by EN 13888.
Tests the complete installation system, not the adhesive alone, under dynamic wheeled load. Worth calling up on commercial and industrial floors where trolley and pallet traffic, rather than water, is the governing action.
Products we recommend and stock
Every product below is one Space Arc Engineering stocks as an authorised distributor. Be clear about this: Fosroc does not run a mainstream tile-adhesive range in India, so do not specify it for the bed. Use UltraTech Tilefixo, SikaCeram or Dr. Fixit there. Fosroc’s real strength in tiling sits underneath and around the tile: Brushbond flexible and crystalline cementitious membranes for bathrooms, balconies, terraces, tanks and pools, Nitobond bonding aids at the screed interface, and Nitoseal sealants in the movement and perimeter joints.
Distributor and applicator, not just a supplier
Tiling failures are almost never a single-product problem; they sit at the joint between the membrane, the adhesive and the grout, which is usually where three different suppliers stop taking responsibility. Space Arc supplies all three from one counter and also fixes them, so compatibility is settled before delivery rather than argued after a leak. Being the applicator is also why the flood test, the open-time discipline and the lift-and-check on bed coverage actually get enforced on site.
- Authorised distributor for Fosroc, Sika, Dr. Fixit, MC-Bauchemie, UltraTech, Master Builders Solutions, STP and D-Seal
- In-house application crews across Delhi NCR, with pan-India project supply
- Specification support before you tender, and site supervision during execution
- Genuine, batch-traceable material direct from authorised channels
Tile adhesives – frequently asked questions
Which tile adhesive should I use for vitrified tiles?
How many square feet does a 20 kg bag of tile adhesive cover?
Can I fix new tiles over existing tiles?
What is the difference between C1 and C2 tile adhesive?
Do I really need epoxy grout, or is cement grout enough?
Why do terrace tiles pop up or tent in summer?
Can tile adhesive be applied directly over a waterproofing membrane?
How long after tiling can the floor be grouted and used?
Related guides
How to Choose the Right Tile Adhesive (Type 1-4)
A practical, cross-brand guide to choosing the right tile adhesive (Type 1-4 per IS 15477) based on your tile type,…
Best Waterproofing for Bathrooms & Wet Areas
A practical, cross-brand guide to waterproofing bathrooms and wet areas the right way: diagnosis, surface prep, the…
Waterproofing systems
What goes under the tile in a wet area.
Not sure which specification your project needs?
Send us the substrate, the exposure and the area. Space Arc Engineering will come back with a specification, a bill of quantities and the datasheets to support it.