How to Specify Grout, Anchors and Admixtures on Indian Sites
Written for specifying engineers, project contractors and plant owners in India. It settles which grout or anchor chemistry a given application actually needs, what gap it tolerates, and where each system fails once monsoon, heat and vibration get to it.
What this guide settles
Match the chemistry to the gap and the load, not to the price. Cementitious shrinkage-compensated grout suits base plates and bolt pockets from 10 to about 125 mm. Low-exotherm grout takes deeper lifts. Epoxy grout is for dynamic, chemically loaded or damp bedding. Chemical anchors are picked by hole condition and design method: polyester for light dry work, vinylester or epoxy for cracked concrete, seismic loads and wet holes. Post-tensioning ducts need a bleed-resistant grout to EN 447, never a site-batched sand mix.
What are you grouting, anchoring or injecting?
Pick the condition that matches your project. The specification, the build-up and the products update as you choose.
Use a high-strength shrinkage-compensated cementitious grout; switch to epoxy only for reciprocating or chemically exposed duty.
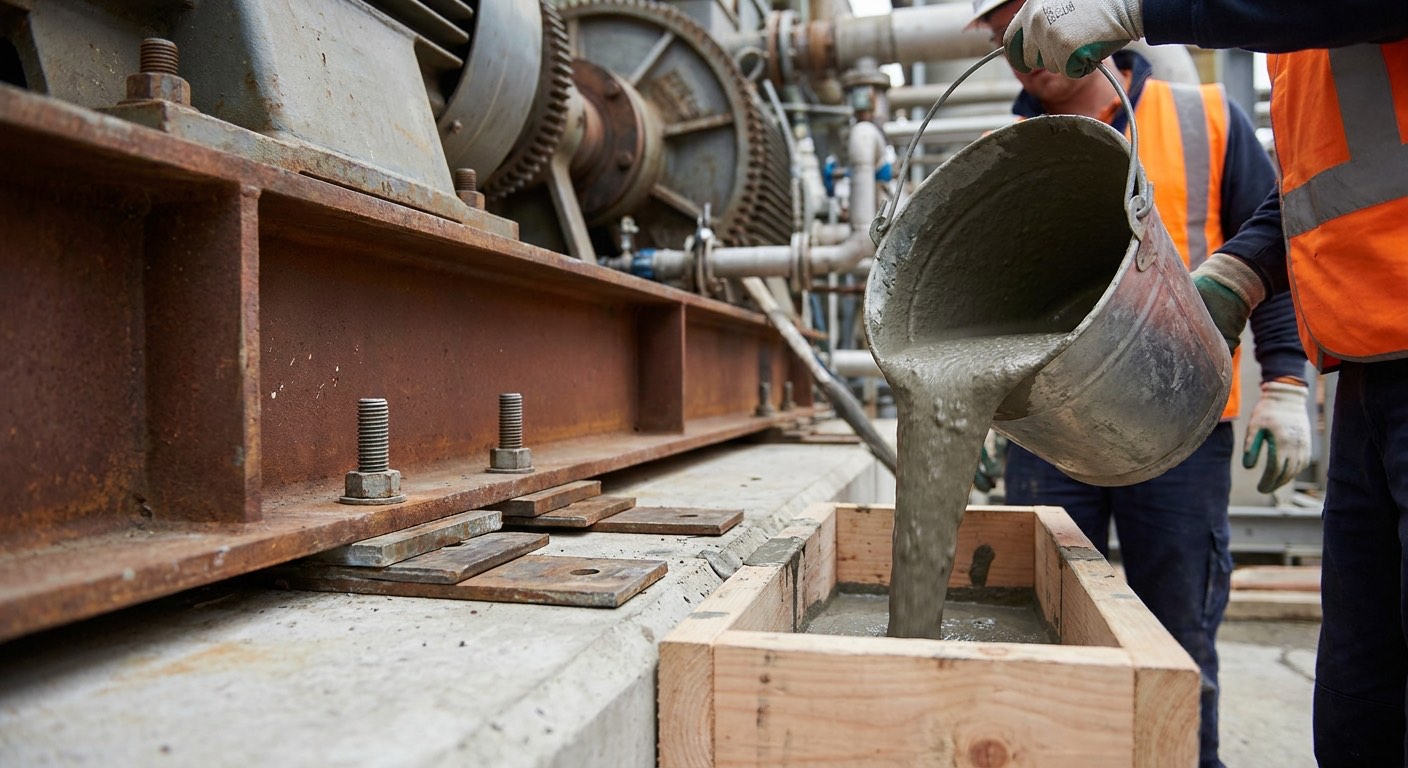
Effective bearing area, not cube strength, is what transmits load. A free-flow cementitious grout at a fixed water ratio will fill a 100 mm gap in one pass and match the plinth’s thermal movement. Epoxy is the right answer under reciprocating compressors, high-cycle vibration or acid and effluent exposure, where cement paste degrades.
- Chip plinth to expose aggregate, remove laitance and oil, saturate 12 h to SSD
- Formwork one side only, 100 mm head box, 45 deg chamfer, all joints sealed
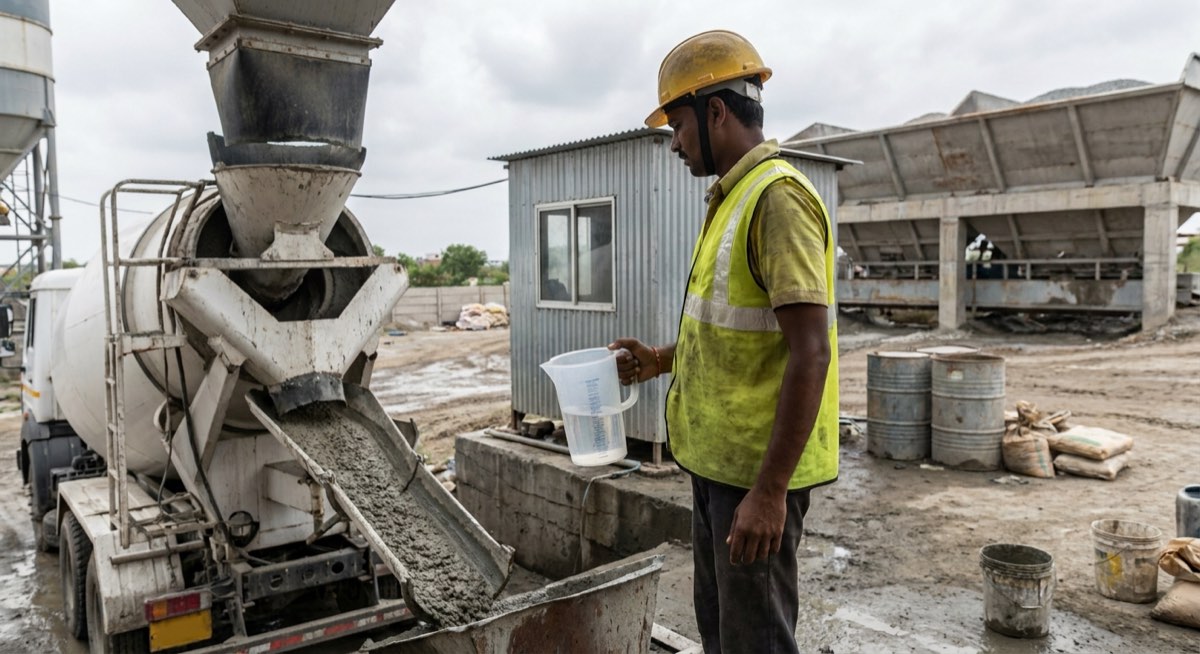
- Mechanical mix 5 min at fixed water ratio; never add water to restore flow
- Place continuously from one side, hold the head until grout surfaces all round
- Cure damp 3 days; torque holding-down bolts only on proven cube strength
Specify a vinylester or epoxy injection anchor with a cracked-concrete approval, sized with the manufacturer’s anchor design software.
A resin anchor exerts no expansion force, so it works at edge distances where an expansion bolt would split the concrete. Choose by hole condition and design case: vinylester for speed and flooded holes, epoxy where load is sustained, embedment is deep or creep and fire matter. Polyester belongs on light dry fixings only.
- Scan for rebar, then rotary-hammer drill to the diameter in the resin’s drilling table, typically stud diameter + 2-4 mm
- Blow-brush-blow three times; a hole cleaned once is a hole that will fail
- Discard the first 10 cm of resin until colour is uniform through the mixer
- Inject from the base of the hole, withdrawing, to about two-thirds full
- Insert with a slow twist; do not disturb until gel time has passed
- Proof-load 1-2% of anchors to ASTM E488 / E1512 before the fixing is loaded
Use an epoxy post-installed rebar system qualified to EN 1504-6 or EAD 330087 and designed to EN 1992-1-1 lap lengths, not to anchor-length embedment.
This is a reinforcement splice, not an anchor. It should be designed for development length from the resin supplier’s bond values, which typically means 15-30 bar diameters, far deeper than an anchor table would suggest. Epoxy is chosen for its bond, low creep and tolerance of damp holes in monsoon conditions.
- Scan and mark existing steel; set out dowels to miss it, not the other way round
- Drill to the design embedment; mark depth on the bit and check every hole
- Blow-brush-blow three times; compressed air must be oil-free
- Inject from the base to two-thirds depth, insert bar with a twist, resin must extrude
- Leave undisturbed for full cure, 24-72 h, before casting concrete against it
- Sacrificial pull-out test on site to confirm the design bond value
Use a bleed-resistant PT grout, either pre-bagged or OPC with a chloride-free expanding admixture batched by weight.
The failure here is invisible. Bleed water rises to the crown of every profile and leaves a void against the strand, which then corrodes in a chloride or carbonating environment. Specify by bleed and fluidity, not strength, keep water/cement at 0.36-0.40, vent every high point, and close a vent only on clean grout.
- Flush and blow ducts; prove continuity inlet to every vent before stressing
- Batch by weight at 0.36-0.40 w/c; high-shear or colloidal mixer, not a drum mixer
- Dose the expanding admixture at the data sheet rate, about 0.45% by weight of cement; never estimate it upward
- Check cone fluidity and 3 h bleed each batch; reject bleed above 0.3%
- Grout within 7 days of stressing; inject from the lowest point continuously
- Close each vent only after clean grout of matching fluidity runs for 10 seconds
- Top up at crowns after settlement; log grout volume against duct volume
Use a free-flow non-bleeding cementitious grout sized to the narrowest section, with an all-fines pumpable grade for tight joints.
The section, not the strength grade, decides. Below about 40 mm a sanded grout arches and bridges; an all-fines pumpable grade fills. Above that a standard precision grout is cheaper and stronger. Both need the joint saturated to SSD first, or the precast unit drinks the mixing water out of the grout.
- Clean the keyway of release agent and dust; grit-blast if the face is glassy
- Saturate 12 h and remove all free water before grouting
- Seal with backer rod and mortar dams; provide a vent at every high point
- Pump or pour from one end only, keeping a continuous flow front
- Cure damp 3 days; do not release props on early strength alone
Fill through a staged port grid with a pumpable all-fines cement slurry, not with concrete poured down a single hole.
A void is rarely a single cavity. Injecting through a grid of ports at staged pressure lets you fill and confirm progressively, and grout appearing at the next port is your proof. Use an all-fines slurry for tight fissured voids; a low-exotherm sanded grout only where the void is genuinely deep and open.
- Map the void by GPR or drilled probe holes before pricing the work
- Set injection ports on a 0.6-1.5 m grid; seal the perimeter first
- Inject the lowest port at low pressure until grout shows at its neighbour
- Cap and move up; log volume per port against the estimated void
- Re-inject after 24 h where volumes were high; settlement will reopen a gap
Epoxy if the crack is dry and dormant and you need the strength back; water-reactive polyurethane if it is wet and running.
Get this the wrong way round and the repair fails within a season. Epoxy will not cure against water and will re-crack alongside a live crack. Polyurethane cures because of water and seals, but restores no structural continuity. On a leaking structural crack, stop the water with PU first, then decide whether epoxy is still needed.
- Classify the crack first: dormant or live, dry or leaking, structural or not
- Drill packers at 45 deg to meet the crack at mid-depth, spaced 0.5x thickness
- Surface-seal the crack line with thixotropic epoxy paste and let it cure
- Inject from the lowest packer upward at 2-6 bar until resin shows at the next
- For live leaks use water-reactive PU through mechanical packers on a high-pressure pump, commonly 80-200 bar, and re-inject after the foam reacts
- Remove packers, grind the seal flush, core-test on structural work
Selections are indicative. Send us the substrate, exposure and area and Space Arc Engineering will confirm the specification.
Systems compared, including where each one fails
Every system here is one Space Arc Engineering both supplies and applies, so the limitations listed are the ones we see on site rather than the ones in a brochure.
Shrinkage-compensated cementitious precision grout
Factory-blended Portland cement, graded silica fillers and a gas-forming expansion agent supplied as a dry powder. Water alone activates it. The gas expansion offsets plastic settlement and drying shrinkage so the hardened grout stays in bearing contact with the underside of the plate.
Everyday base plates, stanchions, bolt pockets and crane rail soles. It is cheap per litre, forgiving to place, fire-resistant, and matches the thermal movement of the concrete it sits on.
Its expansion is spent within hours, so it cannot recover a void created later by vibration or thermal cycling. Under reciprocating compressors, in dilute acid or in sewage H2S it degrades and needs epoxy instead.
Typical spec. Single pour 10-75 mm, up to 125 mm in high-flow grades; water/powder fixed at roughly 0.14-0.19 by weight, measured not judged; flow cone 20-30 s; 24 h strength 20-40 N/mm2 and 28 day 50-100 N/mm2; damp cure 3 days under wet hessian and polythene.
Deep-pour, low-exotherm cementitious grout
The same cement chemistry rebalanced for mass. Coarser graded fillers and lower cement content cut the heat of hydration so a 150 mm lift does not build a thermal gradient that cracks the grout as it cools back to ambient.
Deep bearing pockets, bridge bearing plinths, large mill and turbine foundations, and any pour over about 70 mm where a standard precision grout would have to be placed in awkward lifts.
Early strength is slower, so it is the wrong choice when a machine must be aligned and loaded the next shift. It also needs a genuinely large pour to justify the extra cost and lead time.
Typical spec. Sections 70-250 mm in a single continuous lift; 1 day 30-40 N/mm2 and 28 day 70-80 N/mm2; aggregate extension of 25-50% by weight permitted for very deep sections; place below 35 C substrate temperature; cure 5-7 days.
Epoxy grout and epoxy repair concrete
A three-part thermoset: resin, hardener and graded filler, extended on site with 6-10 mm aggregate. It cures by chemical reaction rather than hydration, so it sets on damp or submerged substrates and resists dilute acid, oil and effluent.
Reciprocating compressors, presses, crushers and any plinth taking dynamic load; effluent and sewage plants where H2S and acid attack cement; and repairs that must carry traffic within a day.
Its thermal expansion is several times that of concrete. On large plates in a terrace or open-yard temperature swing it can debond at the edges. Pot life collapses near 40 C, and it is expensive per litre.
Typical spec. Minimum 20 mm and generally under 100 mm per layer; pot life about 30 min at 35 C and under 20 min at 40 C; 1 day 30-45 N/mm2, and 7 day around 50-60 N/mm2 for an epoxy repair concrete such as Expocrete EC, rising to 85-100 N/mm2 for a precision epoxy machinery grout – check which of the two you are buying; bond to concrete around 3 N/mm2; no water curing, protect from direct sun 24 h.
Polyester and vinylester chemical anchors
Two-part styrene-free resins in coaxial cartridges or pourable packs, cured by free-radical polymerisation. They bond a bar or stud into a drilled annulus by adhesion and micro-keying rather than by wedging, so they exert no splitting force.
Fast turnaround fixings: handrails, cable trays, brackets, light plant. Vinylester grades hold in damp and water-filled holes and carry cracked-concrete and seismic approvals that polyester generally does not.
Both creep under sustained load at elevated temperature, so neither is a general answer for fire-rated or hot-plant anchors. Gel time roughly halves for every 10 C rise: a grade with a six to ten minute working time at 20 C is down to two to four minutes at 40 C.
Typical spec. Hole diameter per the resin’s own drilling table, typically stud diameter + 2-4 mm for threaded rod and bar diameter + 4-8 mm for rebar; embedment 10-15 bar diameters unless the anchor design software says otherwise; blow-brush-blow three cycles; gel 2-10 min over the 20-40 C range Indian sites actually work in, and full load 45 min to 7 h depending on grade and temperature.
Epoxy anchors and post-installed rebar
Pure two-part epoxy, thixotropic or injectable, curing with negligible shrinkage and very high bond to concrete. This is the chemistry the post-installed rebar route is built on: the resin is qualified to EN 1504-6 or EAD 330087, and the connection is then designed as reinforcement to EN 1992-1-1 lap lengths (or EOTA TR 069), not as an anchor.
Starter bars and dowels into existing structures, small edge distances and close spacing, deep embedments, damp or underwater holes, and long-term sustained tension where polyester creep is unacceptable.
Cure is slow and slows further as the substrate cools, stalling winter night work. It is also unforgiving of a dusty hole: bond governs, not resin strength, and drilling dust is the usual reason a pull-out test fails.
Typical spec. Hole diameter bar + 4-10 mm; embedment from the supplier’s rebar design tables, commonly 15-30 bar diameters for a lapped connection; hole cleaned blow-brush-blow three cycles and re-checked; full cure 24-72 h at 20-35 C; proof load 1-2% of installed bars.
Cementitious cable-duct and post-tensioning grout
A neat cement grout, either pre-bagged or OPC plus a plasticising and expanding admixture, designed to stay fluid at a low water/cement ratio, resist bleed and segregation, and completely encase the strand as its permanent corrosion protection.
Post-tensioned decks, metro viaduct segments, silo and tank walls, ground anchors and micropiles, where the grout is the only thing standing between a stressed strand and chloride-laden water.
It is unforgiving of process. Vertical and steeply inclined tendons bleed and leave a void at the crown, and a mix batched by bucket rather than by weight bleeds badly. Once grouted, duct defects are near-undetectable without an impact-echo survey.
Typical spec. Water/cement 0.36-0.40 by weight; expanding admixture at the manufacturer’s stated dosage, typically about 0.45% by weight of cement (Cebex 100 is one 225 g sachet per 50 kg of cement) and never estimated upward; fluidity 15-25 s through the cone at mixing and re-checked at the outlet; bleed under 0.3% at 3 h; 28 day strength 30-45 N/mm2; inject from the lowest point with a vent at every crown.
Injection resins: epoxy and polyurethane
Two families that look alike and do opposite jobs. Low-viscosity epoxy is a structural adhesive that welds a dormant crack back into a monolith. Water-reactive polyurethane foams on contact with water and seals a live leak; it carries no structural credit.
Epoxy restores tensile continuity across shrinkage and overload cracks in beams, slabs and columns. Polyurethane stops running water in basements, lift pits, tunnels and tanks where nothing else will cure.
Epoxy will not cure in a wet crack and re-cracks if the crack is live. Polyurethane restores no strength and can be washed out by a hydrostatic head. Both fail when packers are spaced too far apart to build pressure.
Typical spec. Epoxy LV for cracks from 0.3 mm, thixotropic grade for 0.5-9 mm; packers at 0.5-0.75 times member thickness along the crack line; inject from the lowest packer upward at 2-6 bar until resin shows at the next; water-reactive PU through mechanical packers on a high-pressure pump, commonly 80-200 bar, re-injected after the foam has reacted.
Concrete admixtures: PCE superplasticisers and grout admixtures
Polycarboxylate ether superplasticisers disperse cement by steric hindrance, cutting water demand by around 25-40%, with roughly 30% typical at normal dosage and the top of that range only at high dosage. Grout admixtures are powders combining a plasticiser with a gas-forming expansion agent for site-batched cement grouts. Both are chloride-free, so they are safe against reinforcement and prestressing steel.
PCE gives high-grade and self-compacting concrete at water/cement below 0.30 and cuts precast mould cycles without steam curing. Grout admixtures make a site-batched cement grout behave predictably where bagged product is not viable.
PCE is sensitive to sand fines, clay content and cement chemistry; a dosage proven on one source can bleed or lose slump on another, so trial mixes with the actual site materials are not optional. Overdosing causes segregation and retardation.
Typical spec. PCE dosage 0.3-1.5 litres per 100 kg cementitious, added with the mixing water and never onto dry cement; expanding admixture at the manufacturer’s stated dosage, typically about 0.45% by weight of cement (Cebex 100 is one 225 g sachet per 50 kg of cement) and never estimated upward; verify by trial mix to IS 9103 for slump retention, bleed, setting time and 7 and 28 day strength against a control mix.
What this looks like in practice
The work Space Arc Engineering supplies and applies, matched to the systems and steps described above.
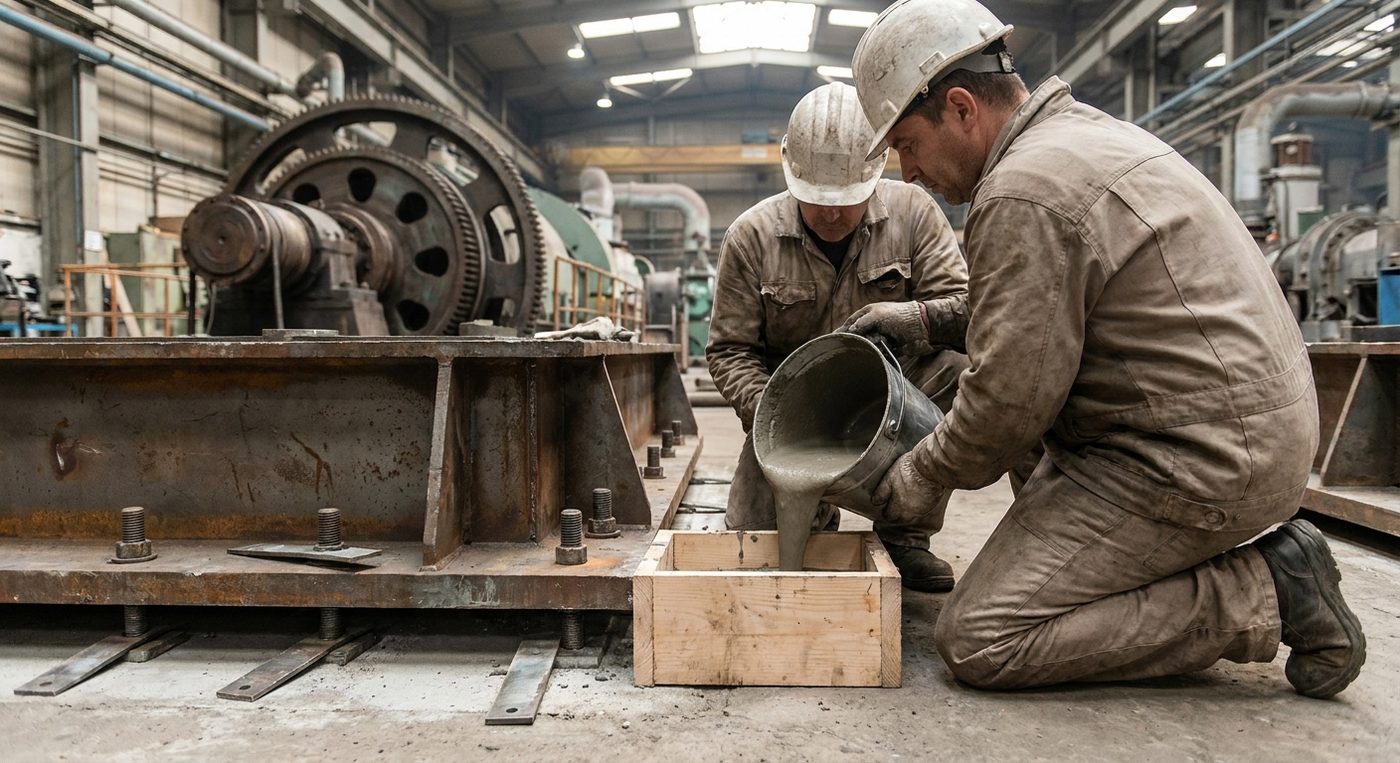
Shrinkage-compensated cementitious precision grout
Factory-blended Portland cement, graded silica fillers and a gas-forming expansion agent supplied as a dry powder. Water alone activates it. The gas expansion offsets plastic settlement and drying shrinkage so the hardened grout stays in bearing contact with the underside of the plate. Everyday base plates, stanchions, bolt pockets and crane rail soles. It is cheap per litre, forgiving to place, fire-resistant, and matches the thermal movement of the concrete it sits on.
Concrete admixtures: PCE superplasticisers and grout admixtures
Polycarboxylate ether superplasticisers disperse cement by steric hindrance, cutting water demand by around 25-40%, with roughly 30% typical at normal dosage and the top of that range only at high dosage. Grout admixtures are powders combining a plasticiser with a gas-forming expansion agent for site-batched cement grouts. Both are chloride-free, so they are safe against reinforcement and prestressing steel. PCE gives high-grade and self-compacting concrete at water/cement below 0.30 and cuts precast mould cycles without steam curing. Grout admixtures make a site-batched cement grout behave predictably where bagged product is not viable.
Comparison table
| System | Practical gap or crack range | Typical 28-day compressive | Working window at 35-40 C | Where it belongs |
|---|---|---|---|---|
| Shrinkage-compensated cementitious grout | 10-75 mm single pour | 50-65 N/mm2 | 15-25 min placing window | Base plates, stanchions, bolt pockets |
| High-flow / high-strength cementitious | 10-125 mm single pour | 60-100 N/mm2 | 15-25 min placing window | Turbines, presses, crane rails, bearings |
| Low-exotherm deep-pour cementitious | 70-250 mm, aggregate extended | 70-80 N/mm2 | 20-30 min placing window | Deep pockets, mass plinths, bearing seats |
| Epoxy grout / epoxy repair concrete | 20-100 mm per layer | 50-60 N/mm2 repair concrete, 85-100 N/mm2 precision grout | Pot life 20-30 min | Reciprocating plant, acid and H2S exposure |
| Polyester anchor resin | Stud dia + 2-4 mm, rebar + 4-8 mm | About 70 N/mm2 resin | Gel 2-4 min | Light to medium dry fixings, non-seismic |
| Vinylester / epoxy anchor resin | Stud dia + 2-4 mm, rebar + 4-10 mm | 90-100 N/mm2 resin | Gel 2-5 min vinylester, 10-20 min epoxy | Cracked concrete, seismic, wet holes, rebar |
| PT and cable-duct grout | Duct annulus at 0.36-0.40 w/c | 30-45 N/mm2 | Pumping window 30-120 min | Post-tensioned decks, ground anchors |
| Injection resin, epoxy LV or PU | 0.3-9 mm cracks | 90+ N/mm2 for epoxy | Pot life 10-20 min | Dormant structural cracks / live leaks |
The correct sequence, in order
Skipping a step here is what turns a specified system into a warranty claim. Space Arc supervises these hold points on the projects it applies.
- 1
Set out, survey and confirm the actual gap
Check plate level, shim or jacking-screw positions and the real gap at four corners. The measured gap decides the product: a 15 mm gap and a 90 mm gap are different materials, and discovering this on pour day is what forces last-minute substitutions.
Hold point: Measured gap recorded at all corners and checked against the chosen grout’s single-pour range before material is ordered. - 2
Prepare the substrate
Break back the plinth to expose sound aggregate, remove laitance, oil and curing compound, and blow out all debris. For cementitious grout, saturate at least 12 hours then remove free water. For epoxy, the surface must be sound and free of standing water.
Hold point: Substrate inspected as rough, clean and saturated-surface-dry, with no standing water and no oil sheen. - 3
Erect and seal the formwork
Form the pour on one side only, with a head box giving 100-150 mm of head and the far-side shutter chamfered at about 45 degrees. Seal every joint, because a slow leak drains the head and stalls the flow front halfway across the plate.
Hold point: Formwork confirmed grout-tight and head box height verified before mixing starts. - 4
Trial mix and fix the water quantity
Mix one bag at the stated water ratio and check flow through the cone against the data sheet at the actual site temperature. Fix that quantity in a marked jug for every subsequent bag and cast cubes from this mix. Reject flow correction by eye during the pour.
Hold point: Flow time within the data sheet band at site temperature, and cubes cast and labelled from the trial batch. - 5
Mix mechanically to the stated time
Add powder to water, never the reverse, and mix with a paddle or forced-action mixer for the full stated time, usually four to five minutes. Hand mixing does not fully activate the expansion system and leaves lumps that block the advancing flow front.
Hold point: Mixer type, timed mixing and consistent batch-to-batch appearance confirmed; any hand-mixed batch rejected. - 6
Place continuously from one side
Pour or pump without interruption from a single side, keeping the head box charged until grout emerges evenly all round. Do not vibrate, rod or trowel the flowing grout. A cold joint formed inside the gap is a permanent void and cannot be seen afterwards.
Hold point: Grout appearing at full section on all remaining sides before placing stops; any interruption longer than the stiffening time voids the pour. - 7
Cure and protect
Strike the head box after initial set, cut the surplus back to a 45 degree fillet, and cure damp under wet hessian and polythene for at least three days. In peak summer, shade the pour: direct sun on a thin exposed edge causes plastic cracking within hours.
Hold point: Curing in place within 30 minutes of finishing and kept continuously wet for the full curing period. - 8
Load, torque and record
Torque holding-down bolts and commission the machine only once the specified strength is proven by cube results, not by elapsed time. Tap-test the plate first. Record grout batch, water used, cube results and ambient temperature against that foundation.
Hold point: Cube results at the specified age plus a hollow-free tap test across the whole plate before final torque and commissioning.
Why this fails on Indian sites
Most failures are not product failures. These are the ones Space Arc Engineering’s applicators get called in to put right, usually years after the original job.
Water added by eye to make it flow
- What you see
- The grout looks perfect on the day, then the plate rings hollow within months and 28-day cubes come back 30-40% below the data sheet figure.
- Root cause
- Every extra litre over the stated water/powder ratio raises porosity and disables the gas expansion system. On most Indian sites the bag is gauged by a mason’s judgement rather than a measuring jug, and hot ambient stiffens the mix so more water goes in to keep it moving.
- How to prevent it
- Issue a marked water jug sized to the bag, mix mechanically for a timed five minutes, and if flow is short, cool the water and shade the bags instead of adding water. Cast cubes from the actual site batch, not from a demonstration mix.
Grout poured from all four sides
- What you see
- The base plate sounds hollow on a hammer tap over its centre, and holding-down bolts lose torque after a few weeks of running.
- Root cause
- Pouring from more than one side traps air against the underside of the plate. The trapped bubble sits exactly where bearing matters most. Effective bearing area can drop below half while the grout still passes every cube test taken from the same batch.
- How to prevent it
- Form and place from one side only, with a head box giving 100-150 mm of head, the far-side shutter chamfered at 45 degrees, and air-release holes drilled through large plates. Tap-test the full plate before torquing down.
The anchor hole cleaned once
- What you see
- Chemical anchors pull out at a fraction of the catalogue load, and the extracted resin plug comes out coated in grey dust.
- Root cause
- Rotary-hammer drilling leaves a compacted dust film on the bore wall, so the resin bonds to dust rather than concrete. Wet-core drilling leaves an equally poor slurry film. This is the single most common cause of a failed anchor proof test on Indian sites.
- How to prevent it
- Blow, brush with the correct-diameter steel brush, and blow again, three complete cycles, using oil-free compressed air. Roughen core-drilled holes. Run a sacrificial pull-out on the first day’s anchors before the remainder are installed.
Resin specified at 20 C, installed at 42 C
- What you see
- Cartridges gel inside the static mixer, anchors set half-inserted, and bars end up hammered home through partly gelled resin.
- Root cause
- Gel time roughly halves for every 10 C rise in substrate temperature. A grade with a 10 minute working time at 20 C is down to about two to three minutes at 40 C, and a pre-monsoon Delhi NCR slab surface easily reaches 50 C by mid-afternoon.
- How to prevent it
- Store cartridges shaded below 25 C, work early morning, choose a hot-climate grade formulated for extended open time, and fit a fresh mixer nozzle after any interruption longer than the gel time.
PT duct grouted without vents at every crown
- What you see
- Nothing visible for years, then corrosion staining at an anchorage or a strand failure found during a routine inspection or an impact-echo survey.
- Root cause
- Bleed water separates and rises to every high point in the tendon profile. Without a vent at each crown that water displaces grout, leaves an air void against the strand, and the strand corrodes in a chloride-bearing or carbonating environment.
- How to prevent it
- Vent at every crown and anchorage, batch by weight at 0.36-0.40 water/cement with a bleed-resistant expanding admixture at the data sheet dosage of about 0.45% by weight of cement, test bleed at three hours every shift, close vents only on clean grout of matching fluidity, and top up after settlement.
Epoxy grout laid to cementitious thickness rules
- What you see
- Cracks appear at the plate edge and around bolt holes in the first hot season, followed by a hollow ring around the perimeter.
- Root cause
- Epoxy expands several times more than concrete with temperature. Placed thick and wide across a plate exposed to a 25-30 C daily swing on a terrace or open yard, it builds shear stress at the bond line until it debonds or cracks the concrete beneath.
- How to prevent it
- Keep epoxy layers within the data sheet range, usually 20-100 mm, break large plates into bays with expansion cuts, and reserve epoxy for dynamic, chemical or damp duty rather than treating it as a default upgrade over cementitious grout.
The standards this work is specified against
Quote these in your tender documents. They are what a third-party inspector will check against, and Space Arc Engineering can supply the batch and compliance paperwork to match.
The Indian benchmark for chemical admixtures, covering the five admixture types it enumerates — accelerating, retarding, water-reducing, air-entraining and superplasticising — plus uniformity and performance limits, and the comparison against a control mix. Any PCE superplasticiser proposed for an Indian project should be verified against it on the actual site materials, not on a generic certificate.
The specification most Indian machine-foundation and base-plate documents reference for pre-bagged cementitious grout under load. It sets the requirement that height must not fall below the placement height, which is the property that actually keeps a plate in bearing.
The test behind the non-shrink claim. It measures the height change of 75 by 150 mm cylinders at 23 +/- 2 C, with readings at 1, 3, 14 and 28 days and the specimen free to move after the first day. Ask for the C1090 result at 28 days, not a marketing statement, when comparing two grouts that both call themselves non-shrink.
The product conformity standard for resins used to anchor reinforcing bar, and the correct thing to demand of the material. It is not a design method: the connection itself is designed to EN 1992-1-1 anchorage and lap lengths, or to EOTA TR 069 for rigid moment connections, using bond values from an ETA to EN 1504-6 or EAD 330087-00-0601. That route drives much deeper embedments than an anchor table.
The tensile and shear test basis for post-installed anchors in cracked and uncracked concrete, including seismic and fatigue loading. It is also the load-application basis to cite when writing a site proof-load regime for anchors installed by others; for adhesive-bonded anchors and post-installed rebar, pair it with ASTM E1512, which covers bond performance specifically.
Defines the materials, composition and grout properties for filling post-tensioning ducts, including fluidity, bleed and volume change. Specify PT grout against this rather than against a compressive strength alone, because bleed and complete duct filling govern tendon durability.
Products we recommend and stock
Every product below is one Space Arc Engineering stocks as an authorised distributor. This is the discipline where Fosroc is genuinely strongest. The Conbextra ladder covers almost every gap and duty from a 10 mm bolt pocket to a deep low-exotherm bearing seat and a heat-resistant boiler saddle, and the Lokfix and Nitofill ranges give anchoring and injection under the same technical support and design software. Where Fosroc is less obviously the first choice is high-volume ready-mix admixture supply, where several brands compete closely on PCE performance and price.
Distributor and applicator, not just a supplier
Grouting fails on execution far more often than on product choice, and a distributor who has never held a head box cannot tell you that. Space Arc supplies the material and also puts crews on the plinth, so the advice covers hole cleaning, mixer type, head height, gel time in a 45 degree afternoon and what to do when a pour stalls. It also means the right grade sits in the Ghaziabad warehouse before the shutdown window opens, rather than being quoted after it closes.
- Authorised distributor for Fosroc, Sika, Dr. Fixit, MC-Bauchemie, UltraTech, Master Builders Solutions, STP and D-Seal
- In-house application crews across Delhi NCR, with pan-India project supply
- Specification support before you tender, and site supervision during execution
- Genuine, batch-traceable material direct from authorised channels

Grouting & anchoring – frequently asked questions
What do GP1, GP2 and GP3 grout grades actually mean?
How much water goes into a 25 kg bag of non-shrink grout?
Is epoxy grout always better than cementitious grout?
How deep should a chemical anchor be embedded?
Can chemical anchors be installed in wet holes during monsoon?
Will epoxy injection stop a leaking crack?
Why do PT cable ducts need a special grout rather than site cement slurry?
How long before I can torque holding-down bolts and run the machine?
Related guides
How to Grout Machine Base Plates Correctly
A practical, cross-brand guide to grouting machine base plates the right way, covering grout selection, surface…
Cementitious vs Epoxy Non-Shrink Grout
A practical, cross-brand comparison of cementitious and epoxy non-shrink grout for baseplates, anchors and equipment…
How to Select the Right Concrete Admixture
Confused between superplasticizers, retarders, accelerators and integral waterproofers? This cross-brand guide shows…
Not sure which specification your project needs?
Send us the substrate, the exposure and the area. Space Arc Engineering will come back with a specification, a bill of quantities and the datasheets to support it.