
How to Specify an Industrial Floor That Survives Indian Sites
Written for specifiers, contractors and plant owners choosing between epoxy, polyurethane, screeds and surface hardeners. It resolves the two questions that decide everything: what the floor actually carries, and what gets spilled, washed or dropped on it.
What this guide settles
Industrial floor selection turns on two variables: traffic class and exposure. Foot and light trolley traffic in dry areas needs only a densified slab or a 300 micron epoxy coating. Forklift and pallet-truck duty needs a dry-shake hardener or 4 to 6 mm of trowelled epoxy mortar. Wet, chemical or thermal-shock service such as dairies, breweries and steam wash-down needs 6 to 12 mm of polyurethane concrete, because epoxy debonds under hot water. Every system in this list fails if the slab is damp or mechanically unprepared.
What duty does this floor actually see? Pick the heaviest traffic class and the worst-case exposure.
Pick the condition that matches your project. The specification, the build-up and the products update as you choose.
Densify the existing slab, or lay a 300 micron epoxy roller coating for colour and wipe-down.
A coating on a foot-traffic floor is doing a cleaning and appearance job, not a structural one, so extra thickness buys you nothing. If the slab is sound and you only want dust control, a lithium densifier costs less and cannot blister. Choose epoxy only when you need colour, chemical wipe-down or a sealed hygienic surface.
- Grind or light shot blast to remove laitance, curing compound and surface contamination
- Option A: flood coat lithium densifier at 10 to 12 m2/litre, squeegee excess off at 20 min
- Option B: epoxy primer, then two coats of epoxy floor coating to 300 micron total DFT
- Broadcast anti-slip aggregate into the first topcoat in any wet, ramped or entrance area
Dry-shake hardener broadcast into the fresh slab, densified and burnished at 28 days.
Hand pallet trucks and nylon castors concentrate load on a small contact patch, which polishes a thin coating but barely troubles a hardened slab. A dry-shake hardener costs a fraction of resin per square metre, has no bond line to fail and survives being cast during monsoon. Its one limitation is that you must decide before the concrete is placed.
- Design slab to M25 minimum, 300 kg/m3 cement, water-cement ratio below 0.55
- Broadcast hardener 2 to 3 kg/m2, float, then 1 to 2 kg/m2 at right angles and float again
- Power-trowel to a closed finish, then wet cure or spray curing membrane for 7 days
- Saw-cut joints at 4 to 6 m centres as soon as the slab will carry the saw without ravelling, typically 4 to 12 hours with a conventional saw or 1 to 4 hours with an early-entry saw, and at the earlier end in summer
- At 28 days apply lithium densifier and burnish for dust control and sheen
4 to 6 mm trowelled epoxy mortar screed on an existing slab; dry-shake hardener on a new pour.
Counterbalance forklift wheels generate contact stress that no film-forming coating survives, so you need an aggregate matrix under the wheel. On a new build the dry-shake hardener is the cheaper route by a wide margin. On an existing slab you cannot re-cast, so 4 to 6 mm of trowelled epoxy mortar over a blasted CSP 4 profile is the realistic answer.
- Survey for hollow areas and moisture; reject the slab above 75 percent in-situ RH
- Shot blast to CSP 4 and cut 6 mm anchor grooves at all perimeters and thresholds
- Epoxy primer, overlaid inside the stated window, typically 30 minutes at 30 C
- Trowel epoxy mortar screed at 4 to 6 mm, worked bay by bay to the saw-cut lines
- Seal coat, then re-cut and fill all movement joints with a semi-rigid joint filler
6 mm epoxy mortar screed with a chemical-resistant seal coat, full coving and falls to a bund.
Chemical spill duty changes the failure mode from wear to attack, and attack always starts at the thinnest point in the system. Build the thickness in the screed, then seal with a chemically resistant epoxy you can renew later without removing the screed. Cove into every plinth and bund kerb so liquid never reaches a joint or a wall junction.
- Reinstate spalled or chemically eroded concrete with epoxy repair concrete at 20 mm plus
- Shot blast to CSP 4 to 5; form 100 mm coving to walls, plinths and bund kerbs
- Epoxy primer, then 6 mm trowelled epoxy mortar screed laid to falls toward collection
- Two coats of solvent-free chemical-resistant epoxy at 0.35 kg/m2 per coat, around 250 micron each, to 500 micron total over the screed
- Key and terminate the finish inside the gully; never stop it at a bare edge
6 to 9 mm cementitious polyurethane screed, laid to falls, with 100 mm coving throughout.
Hot water is what kills epoxy in food plants, not the product being made. At around 60 C the difference in thermal expansion between epoxy and concrete exceeds the bond strength and the floor peels. Cementitious polyurethane moves with the slab and tolerates lactic and acetic acid. Fosroc’s flooring range stops short here, so we specify Ucrete or PurCem class material.
- Confirm falls to drains and correct with epoxy repair concrete before the topping is laid
- Shot blast to CSP 5 and cut 6 x 6 mm anchor grooves at every perimeter and drain
- Trowel 6 to 9 mm cementitious polyurethane screed onto the damp-tolerant prepared slab
- Form 100 mm minimum coving in the same material at all wall and plinth junctions
- Finish with a light broadcast texture targeting DIN 51130 R11 for wet slip resistance
9 to 12 mm cementitious polyurethane, anchored at every perimeter, doorway and drain.
Steam lances, autoclave discharge and freezer-to-ambient cycling put the bond line through repeated shear. Thickness is the defence: 9 to 12 mm of polyurethane concrete carries enough mass to absorb the thermal gradient before it reaches the interface. Anchor grooves at every free edge stop one lifted corner from unzipping an entire bay.
- Pull-off test the bare slab first to ASTM C1583; require cohesive failure in the concrete, not at the surface
- Shot blast to CSP 5; cut and key anchor grooves at all edges, doorways and drain surrounds
- Trowel 9 to 12 mm polyurethane concrete in bays matched to the underlying slab joints
- Carry every movement joint through and fill with a flexible chemically resistant sealant
- Cove 150 mm at wall junctions and dress the finish into stainless drain flanges
Test to ASTM F2170 first, then install a two-coat epoxy surface DPM before any finish.
Moisture is the single most common cause of resin floor failure in India and it is invisible on the day of application. If in-situ relative humidity exceeds 75 percent, or the slab was cast without polythene beneath it, no amount of surface preparation will save the floor. Put the barrier in and lose two days rather than the whole floor.
- Test in-situ RH to ASTM F2170, probes at 40 percent of slab depth on a ground-bearing slab drying from one side or 20 percent where it dries from both faces, minimum three points per bay
- Shot blast to CSP 3 to 4 before any barrier goes down; never coat over laitance
- Apply two cross-coats of epoxy surface DPM in contrasting colours to 500 micron total
- Level with self-smoothing epoxy underlay at 1.5 to 5 mm where flatness is out of tolerance
- Build the wearing system chosen for the duty class over the fully cured barrier
Selections are indicative. Send us the substrate, exposure and area and Space Arc Engineering will confirm the specification.
Systems compared, including where each one fails
Every system here is one Space Arc Engineering both supplies and applies, so the limitations listed are the ones we see on site rather than the ones in a brochure.
Dry-shake surface hardener (monolithic topping)
A factory-blended dry mix of graded hard-wearing aggregate, Portland cement and workability additives broadcast onto fresh concrete at 3 to 5 kg per square metre, then floated and power-trowelled in. It becomes part of the slab rather than a layer bonded to it.
Cheapest durable floor per square metre across large warehouse bays. No bond line means no debonding risk, and it tolerates the damp slabs and monsoon casting programmes that defeat resin systems entirely.
It is a one-shot process tied to the concrete pour. Broadcast late, float a bleeding surface or overwork it and you get a weak crusted layer that scales under forklift wheels. It offers no chemical resistance and still dusts slightly.
Typical spec. Broadcast 3 to 5 kg/m2 in two stages at right angles onto a minimum M25 slab with 300 kg/m3 cement and water-cement ratio below 0.55. Power-float, power-trowel to a closed finish, wet cure 7 days. Abrasion resistance several times that of the untreated control concrete, measured to ASTM C779.
Liquid silicate densifier and burnished concrete
A water-thin lithium or sodium silicate solution that reacts with free calcium hydroxide in the slab to form additional calcium silicate hydrate gel, filling capillaries in the top few millimetres. It adds no thickness and changes no floor levels.
The retrofit answer for existing dusty slabs where headroom, door thresholds and racking heights cannot change. Zero VOC, no bond line, no blistering mechanism, and it can be applied in an occupied warehouse over a weekend.
It hardens what is already there and nothing more. On a weak, over-watered or already scaling slab the improvement is marginal. It gives no chemical barrier, no colour and no protection against oil and hydraulic fluid staining.
Typical spec. Single flood coat at 10 to 12 m2 per litre on a clean, saturated-surface-dry slab, kept wet 20 minutes with excess squeegeed off. Foot traffic in 1 to 2 hours, 24 hours before any overcoating. Abrasion improvement measured to ASTM C779.
Thin-film epoxy coating (roller or squeegee applied)
Two-component solvent-free epoxy applied over a primed slab to build 200 to 500 microns of dry film across two or three coats. Chemically it is a barrier and a cleanable skin, not a wearing course with load-carrying aggregate.
Fast, economical, seamless and easy to clean. The right answer for assembly halls, workshops, corridors, plant rooms, stores and light packing areas with foot traffic, hand pallet trucks and occasional rubber-tyred vehicles.
This is routinely over-specified. At 300 microns it polishes through under counterbalance forklift wheels and steel castors inside one to two years, and it bridges nothing: every saw cut and shrinkage crack prints through within weeks.
Typical spec. Shot blast to CSP 3, prime, then 2 to 3 coats to 300 to 500 micron total DFT. Coverage around 5 m2 per litre per coat at 200 micron wet film. Foot traffic 24 hours, full chemical cure 7 days at 30 C. Broadcast anti-slip grain into the first topcoat in wet areas.
Self-smoothing epoxy topping (2 to 3 mm)
A pre-weighed multi-component kit of epoxy base, hardener, graded aggregate and pigment poured onto primed concrete, spread with a notched trowel and spike-rolled to release entrained air. It flows out to a jointless 2 to 3 mm film.
Among the best appearance-to-durability ratios available for pharma clean rooms, electronics assembly, food packing halls and hospital corridors. Seamless, coves cleanly into walls, wipes down easily and masks minor substrate texture.
Unforgiving of substrate flatness and of moisture. Under LED lighting it shows every trowel stop and mix boundary. It is genuinely slippery when wet unless aggregate is broadcast, which then removes the smooth aesthetic you paid for.
Typical spec. Prime, level with a 1.5 to 5 mm self-smoothing epoxy underlay where flatness is out, then pour 2 mm nominal at around 7.5 m2 per 15 litre pack. Compressive strength around 50 N/mm2 at 7 days. Foot traffic 24 hours, wheeled traffic 48 hours at 20 C.
Trowel-applied epoxy mortar screed (3 to 6 mm)
Resin-rich solvent-free epoxy heavily filled with graded quartz, laid with a hand or power trowel from 3 mm upward. Functionally it is an epoxy concrete: the aggregate skeleton carries the load and the resin binds and seals it.
The workhorse for counterbalance forklift and steel-wheel traffic in dry to damp process areas. It takes point load, impact and abrasion that no coating survives, and it can be laid to falls and dressed into drains.
Hot water and steam. Above roughly 60 C the difference in thermal expansion between epoxy and concrete exceeds the bond and it peels in sheets. Chemically it handles dairy and brewery spillage at ambient perfectly well, and Nitoflor TF30 is rated excellent against 10 percent lactic acid and 30 percent sodium hydroxide, but that resistance falls away as temperature rises, which is what rules it out of daily hot-sanitised process bays.
Typical spec. Prime with epoxy primer and overlay within the stated window, then trowel 3 to 6 mm. Typical compressive strength around 75 N/mm2, flexural around 26 N/mm2, bond around 3 N/mm2. Pot life falls to about 30 minutes at 30 C. Initial hardness 16 hours, full cure 7 days.
Polyurethane concrete screed (6 to 12 mm)
A cementitious polyurethane hybrid of polyol, isocyanate, cement and graded aggregate mixed on site and trowelled at 6 to 12 mm. Its coefficient of thermal expansion is close to that of concrete, so it stays bonded through steam and thermal cycling. No Fosroc India product sits in this class: Expocrete EC is listed here only for the repair and falls correction that precedes the topping, and the screed itself is specified as Ucrete or PurCem class material.
The default resin answer for wash-down food and beverage plants, cold stores, and any floor exposed to steam cleaning or hot spillage, the main alternative being an acid-resistant tiled or brick floor. It tolerates damp and relatively green slabs and resists lactic, acetic and citric acid.
Expensive, and deliberately textured, so it is not a showroom finish and it traps soiling where the cleaning regime is poor. Aromatic grades yellow in daylight. Application is unforgiving above about 30 C ambient because working time collapses.
Typical spec. Shot blast to CSP 5 or coarser, cut 6 x 6 mm anchor grooves at all perimeters, doorways and drains, then trowel 6 mm for wet duty or 9 to 12 mm where thermal shock applies, with 100 mm minimum coving. Return to service typically 12 to 24 hours.
Polyaspartic fast-return coating system
A two-component polyaspartic, chemically an aliphatic polyurea based on aspartic esters, applied as a primer plus one or two topcoats to roughly 0.8 to 1.2 mm. It cures in minutes rather than hours and stays colour-stable in daylight.
Shutdown work. A dispatch dock, commercial kitchen or logistics aisle can be blasted, coated and back under traffic inside a single day. UV stability also makes it viable on exposed ramps, balconies and car park top decks. Cold stores are the exception: the space has to be brought above 5 C before coating, which usually makes polyurethane concrete the better answer there.
Working time is measured in minutes, so it punishes untrained crews and large open bays where a wet edge cannot be held. Material cost per square metre is high, and at 1 mm it remains a coating: it will not carry steel-wheel point loads.
Typical spec. Prime, then 1 to 2 topcoats to 0.8 to 1.2 mm total, applied between 5 and 30 C. Touch dry around 60 minutes per coat, return to service around 2 hours. Anti-slip grains broadcast in fine, medium or coarse grades. Bond strength around 3.8 MPa to EN 1542.
Epoxy surface damp-proof membrane build-up
A two-component solvent-free epoxy applied at 250 to 500 microns directly to a damp slab to suppress residual construction moisture before a resin, vinyl or timber floor is laid. It is a barrier layer, never a wearing surface.
Slabs cast through the monsoon, ground-bearing slabs with no polythene beneath, and programmes that cannot wait for natural drying. It tolerates substrate readings up to around 98 percent relative humidity against the usual 75 percent ceiling.
It stops vapour, not liquid water. Hydrostatic pressure from a high water table or a leaking buried drain will lift it regardless of thickness. It is also worthless if applied over laitance, because it can bond no better than the layer beneath it.
Typical spec. One coat at 250 micron (around 4 m2/kg) as a damp-tolerant primer, or two cross-applied coats in contrasting colours to 500 micron total (around 2 m2/kg) as a full DPM. Pot life around 25 minutes at 20 C, recoat around 12 hours. Not suitable over under-floor heating.
Comparison table
| System | Typical thickness | Duty ceiling | Service temperature | Return to service |
|---|---|---|---|---|
| Dry-shake hardener, monolithic | 2 to 3 mm hardened zone | Counterbalance forklift, steel wheel | Limited by the concrete, not the resin | 7 day wet cure |
| Lithium silicate densifier | No added thickness | Pallet truck to light forklift | Limited by the concrete, not the resin | 1 to 2 hours |
| Epoxy roller coating | 0.2 to 0.5 mm | Foot traffic and hand pallet truck | Around 50 C, dry only | 24 h foot, 7 d chemical |
| Self-smoothing epoxy topping | 2 to 3 mm | Pallet truck and light forklift | Around 50 C, dry only | 24 h foot, 48 h wheeled |
| Trowelled epoxy mortar screed | 3 to 6 mm | Counterbalance forklift, impact | Around 60 C, dry to damp | 16 h hardness, 7 d cure |
| Polyurethane concrete screed | 6 to 12 mm | Steel wheel, impact, hot wash-down | 70 to 150 C by thickness | 12 to 24 hours |
| Polyaspartic coating system | 0.8 to 1.2 mm | Foot traffic and trolleys, UV stable | Around 50 C, dry only | Around 2 hours |
| Epoxy surface DPM | 0.25 to 0.5 mm | Barrier only, must be overlaid | Not a wearing surface | About 12 h recoat |
What this looks like in practice
The work Space Arc Engineering supplies and applies, matched to the systems and steps described above.
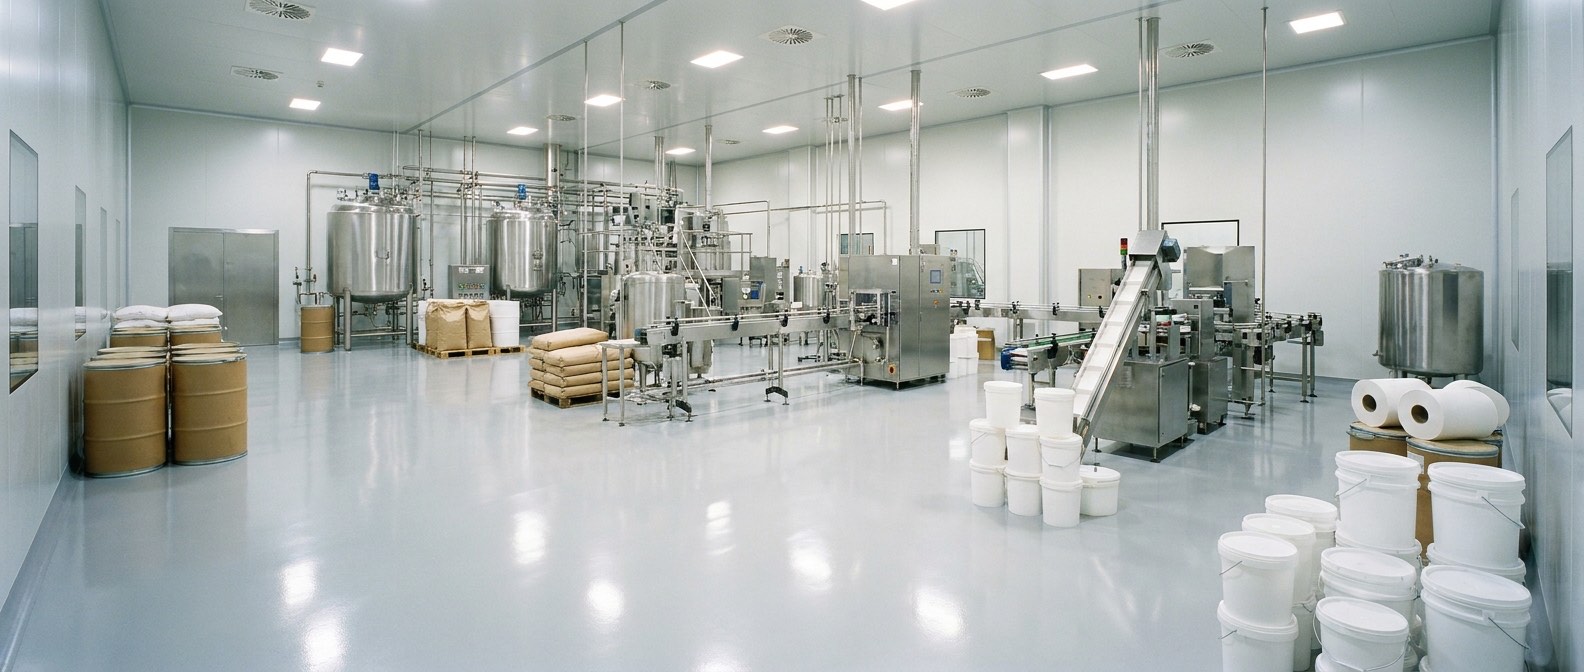
Self-smoothing epoxy topping (2 to 3 mm)
A pre-weighed multi-component kit of epoxy base, hardener, graded aggregate and pigment poured onto primed concrete, spread with a notched trowel and spike-rolled to release entrained air. It flows out to a jointless 2 to 3 mm film. Among the best appearance-to-durability ratios available for pharma clean rooms, electronics assembly, food packing halls and hospital corridors. Seamless, coves cleanly into walls, wipes down easily and masks minor substrate texture.
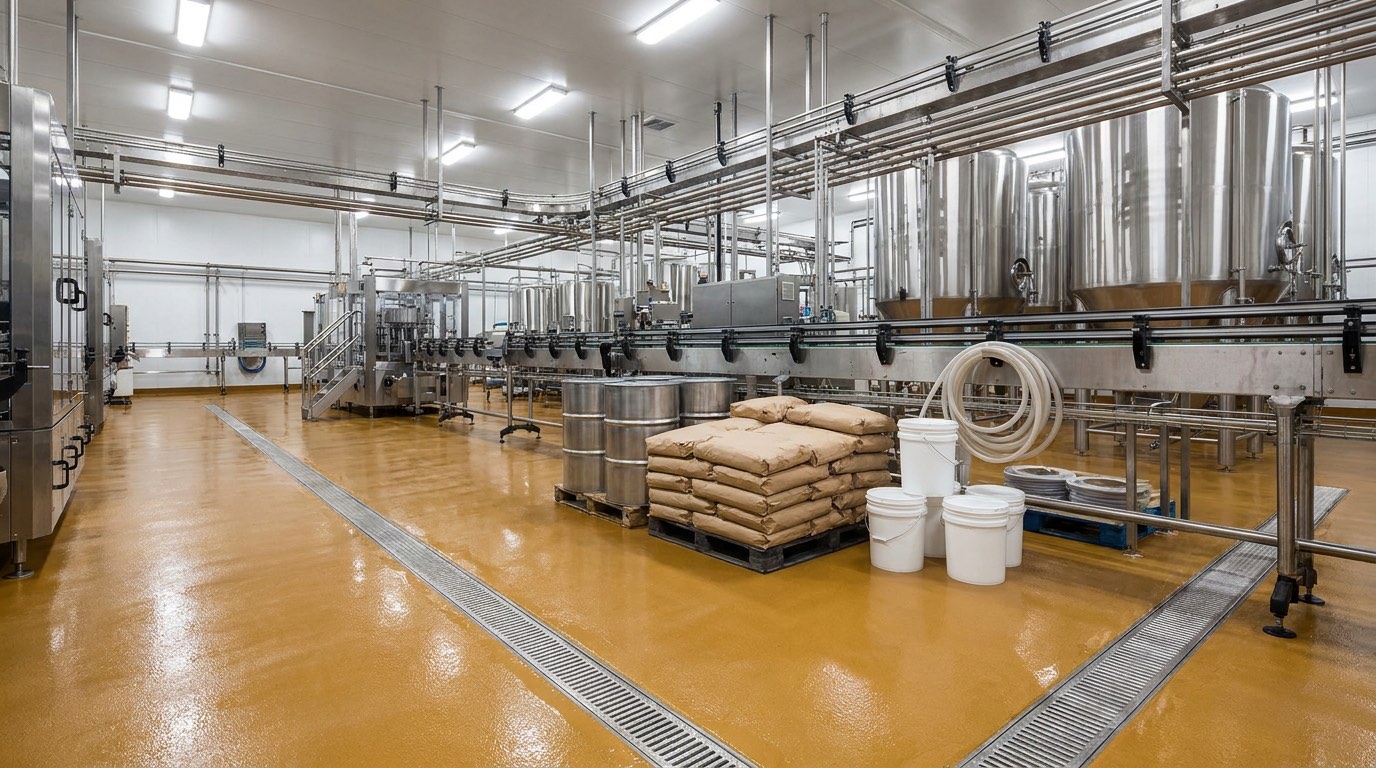
Polyurethane concrete screed (6 to 12 mm)
A cementitious polyurethane hybrid of polyol, isocyanate, cement and graded aggregate mixed on site and trowelled at 6 to 12 mm. Its coefficient of thermal expansion is close to that of concrete, so it stays bonded through steam and thermal cycling. No Fosroc India product sits in this class: Expocrete EC is listed here only for the repair and falls correction that precedes the topping, and the screed itself is specified as Ucrete or PurCem class material. The default resin answer for wash-down food and beverage plants, cold stores, and any floor exposed to steam cleaning or hot spillage, the main alternative being an acid-resistant tiled or brick floor. It tolerates damp and relatively green slabs and resists lactic, acetic and citric acid.
The correct sequence, in order
Skipping a step here is what turns a specified system into a warranty claim. Space Arc supervises these hold points on the projects it applies.
- 1
Fix the duty class before anything else
Walk the floor with the operations team and record four numbers: the heaviest wheel load, the worst chemical spill, the hottest wash-down and the maximum acceptable downtime. Those four decide the system. Everything after this point is execution.
Hold point: Duty class and cleaning regime written into the specification and signed by the plant, not inferred from the building type. - 2
Survey and test the substrate
Hammer-tap for hollow areas, check falls with a laser level, and measure in-situ relative humidity to ASTM F2170, with probes at 40 percent of slab depth for a ground-bearing slab drying from one side, or 20 percent where the slab can dry from both faces. Take at least three readings per bay and one within a metre of every external wall.
Hold point: Written moisture readings on the layout drawing and a recorded decision on whether a surface damp-proof membrane is required. - 3
Repair, falls and joint mapping
Cut out spalled and oil-soaked concrete and reinstate with epoxy repair concrete at 20 mm minimum per layer. Correct falls to drains now with repair material, not later with the topping. Mark every construction and movement joint on the slab and on the drawing.
Hold point: All joints marked in paint on the floor and agreed with the client before surface preparation begins. - 4
Mechanical preparation
Shot blast to the profile the chosen system needs: CSP 3 for coatings, CSP 4 to 5 for epoxy screeds, CSP 5 or coarser for polyurethane concrete. Cut anchor grooves at every perimeter, doorway, drain and free edge. Vacuum the surface rather than sweeping it.
Hold point: An agreed CSP reference coupon on site, plus substrate pull-off tests to ASTM C1583 failing cohesively within the concrete. - 5
Prime or install the moisture barrier
Apply the specified primer or epoxy surface DPM and respect the overcoat window absolutely. A primer left beyond its window has cured to a closed film and must be re-abraded before the next layer, not simply coated over and hoped for.
Hold point: Overcoat window recorded against actual slab temperature; any bay outside the window is re-abraded before work proceeds. - 6
Lay the body of the floor
Mix full packs only, work bay to bay against the saw-cut lines and keep a wet edge throughout. Check thickness with depth pins or a wet film gauge on every mix. Between April and June, run night shifts and set out from slab temperature, not air temperature.
Hold point: Recorded material consumption per bay reconciled against the specified coverage rate, mix by mix. - 7
Detail the edges, drains and joints
Form coving at wall and plinth junctions, dress the finish into drain flanges and door thresholds, then re-cut every movement joint on its original line and fill with a semi-rigid or flexible filler sized to the expected movement.
Hold point: No movement joint filled with floor resin, and no finish terminated at an unkeyed free edge anywhere on the floor. - 8
Cure, test and hand over
Protect from water, dust and traffic for the full stated cure period, not just until the surface feels hard. Chemical resistance typically needs seven days. Test wet slip resistance, and on conductive floors point-to-ground resistance, before release.
Hold point: Documented cure period observed and a signed handover record issued with the cleaning and maintenance regime for the specific system.
Why this fails on Indian sites
Most failures are not product failures. These are the ones Space Arc Engineering’s applicators get called in to put right, usually years after the original job.
Osmotic blistering under resin floors
- What you see
- Domed blisters 5 to 50 mm across appear two to eight weeks after handover, usually in patches rather than uniformly. Puncture one and clear or straw-coloured liquid weeps out under pressure.
- Root cause
- Water vapour rising through a slab with no membrane beneath meets the impermeable resin film. Soluble salts left in the concrete create an osmotic cell that keeps pumping water into the bond line until the film lifts.
- How to prevent it
- Test to ASTM F2170 and reject above 75 percent internal relative humidity, or specify a two-coat epoxy surface damp-proof membrane. On ground-bearing slabs cast during monsoon in NCR, treat the DPM as mandatory rather than as a cost option.
Delamination from grinding instead of blasting
- What you see
- The floor sounds hollow when tapped and peels away in sheets at joints, doorways and forklift turning circles, usually inside the first year. The underside of the peeled sheet carries a dusty grey powder.
- Root cause
- Acid etching or a light diamond grind removes the surface film but leaves laitance in place and burnishes the pores closed. There is no mechanical key, so the whole floor hangs off the weakest one to two millimetres of slab.
- How to prevent it
- Shot blast to a CSP 3 profile for coatings, CSP 4 to 5 for epoxy screeds and CSP 5 or coarser for polyurethane concrete. Verify the bare prepared slab with pull-off testing to ASTM C1583 and insist on cohesive failure in the concrete rather than adhesive failure at the interface.
Pot life collapse in the Indian summer
- What you see
- Material ropes, drags and gels in the bucket. Roller laps and trowel stops stay permanently visible. Self-smoothing floors refuse to flow out and leave a ridge at every mix boundary.
- Root cause
- Epoxy exotherm roughly doubles for each 10 C rise. A resin quoting 60 minutes pot life at 20 C can give under 30 minutes at 35 C, and a west-facing slab reading 45 C surface temperature in May accelerates it further still.
- How to prevent it
- Work night or early-morning shifts from April to June, store components in a conditioned room, mix half batches, and take the decision from slab surface temperature measured with an infrared gun rather than from air temperature.
Cracks printing through at saw-cut joints
- What you see
- A dead-straight crack reappears in the new floor within weeks, directly above every existing saw cut and construction joint, sometimes with the resin edges curling slightly upward.
- Root cause
- Resin floors have essentially no capacity to bridge a moving joint. Filling saw cuts flush with the same resin locks the slab together and forces the movement to relieve itself by tearing the topping along the same line.
- How to prevent it
- Carry every movement and construction joint through the new floor, re-cut on the original line, and fill with a semi-rigid polyurea or a flexible sealant sized to the expected movement. Never fill a movement joint with the floor resin itself.
Epoxy specified where hot wash-down rules
- What you see
- The floor softens, blanches or goes chalky in the wash-down aisles and around drains, then abrades away in months, while the same floor in the dry storage bays still looks close to new.
- Root cause
- Bisphenol-A epoxy resists most dairy and brewery chemistry at ambient temperature, but its resistance falls sharply as the wash water gets hotter, and it debonds above roughly 60 C. A cleaning cycle applies aggressive chemistry and thermal shock together, several times a day, and it is the temperature that does the damage.
- How to prevent it
- Map the actual cleaning regime rather than the product being manufactured: chemical, concentration, temperature and dwell time. Where hot wash-down exists at any frequency, specify cementitious polyurethane and budget for it from the start.
A 300 micron coating sold as a forklift floor
- What you see
- Wheel tracks polish through to grey concrete along the main aisle and at every turning point inside 12 to 24 months, while the untrafficked bays and the sample area still look glossy and sound.
- Root cause
- A coating has no aggregate matrix to distribute point load, so solid-tyre and steel-wheel contact stress crushes and grinds the film away. The failure usually starts at tender stage, where price per square foot was compared across systems of different duty class.
- How to prevent it
- Fix the duty class before comparing prices, and make it a line item in the tender. Foot and hand-pallet traffic takes a coating. Counterbalance forklifts need 4 mm or more of filled screed, or a dry-shake hardened slab.
The standards this work is specified against
Quote these in your tender documents. They are what a third-party inspector will check against, and Space Arc Engineering can supply the batch and compliance paperwork to match.
The Indian baseline for the concrete floor itself: base preparation, bay sizes, joint layout, topping thickness and curing. Every resin system in this guide is only as good as the slab this code governs.
The reference test behind hardener and densifier abrasion claims. When a supplier quotes a percentage improvement in wear resistance, ask which of the three C779 procedures produced it and against what control concrete.
The go or no-go test for every resin floor. Probes are set at 40 percent of slab depth where the slab dries from one side only, or 20 percent where it can dry from both faces, and left to equilibrate. Above roughly 75 percent internal RH you need a surface damp-proof membrane, not optimism.
The test for the bare prepared slab, before any coating goes down. It measures the tensile strength of the concrete surface itself, so it tells you whether shot blasting has exposed sound concrete or merely opened a weak laitance layer. Specify it as a hold point after preparation and require cohesive failure within the concrete.
The objective check on the finished system: it measures the adhesion of the applied coating to the concrete. Specify it as a hold point after application and require cohesive failure in the concrete rather than adhesive failure at the coating interface. For testing the bare prepared slab before any coating goes down, use ASTM C1583 instead.
Supplies the classification language specifiers should be writing into tenders: compressive and flexural class, wear resistance, surface hardness, bond strength and resistance to rolling wheel. It makes competing quotations genuinely comparable.
Source of the R9 to R13 slip ratings. Specify an R value for wet process areas, kitchens and ramps rather than leaving anti-slip aggregate as a discretionary site decision.
Products we recommend and stock
Every product below is one Space Arc Engineering stocks as an authorised distributor. Fosroc is strongest here at the two ends of the range: slab-integral hardeners and densifiers such as Nitoflor Roc and Nitoflor LH, and the epoxy family running from Nitoprime primers through Nitoflor SL and TF30, with Nitoflor DPM covering damp slabs. Be clear about the gap. Fosroc’s Indian flooring line does not carry a cementitious polyurethane screed, so for steam wash-down and thermal shock we specify Ucrete or PurCem class material instead.
Distributor and applicator, not just a supplier
Flooring is the one discipline where the supplier and the applicator argue after a failure. We work upstream of that argument. We will walk the slab with you, take the in-situ RH reading, and put in writing whether a surface DPM is required before anything is ordered from our warehouse in Ghaziabad. We specify to Indian summer pot life and monsoon slab conditions rather than to a European datasheet, and we will name the hold points your applicator has to meet: moisture, CSP profile and pull-off test.
- Authorised distributor for Fosroc, Sika, Dr. Fixit, MC-Bauchemie, UltraTech, Master Builders Solutions, STP and D-Seal
- In-house application crews across Delhi NCR, with pan-India project supply
- Specification support before you tender, and site supervision during execution
- Genuine, batch-traceable material direct from authorised channels

Industrial flooring – frequently asked questions
How thick should an epoxy floor be for a warehouse with forklifts?
What is the real difference between epoxy and PU flooring?
Can epoxy flooring be applied during the monsoon?
Why is my epoxy floor peeling off in sheets?
Is a concrete floor hardener cheaper than epoxy flooring?
What flooring is required for a food processing plant in India?
How do I specify an anti-static or ESD floor?
How long after casting can a resin floor be laid?
Related guides
Epoxy vs PU (Polyurethane) Industrial Flooring
A practical, cross-brand comparison of epoxy and PU (polyurethane) industrial flooring, covering durability, chemical…
Protective coatings
Where a coating stops and a floor screed starts.
Concrete repair
Fixing the slab before you surface it.
Not sure which specification your project needs?
Send us the substrate, the exposure and the area. Space Arc Engineering will come back with a specification, a bill of quantities and the datasheets to support it.